Ever caught yourself wondering how your iPhone and Apple Watch seem to know every little thing you do? Whether you’re sprinting to catch…
Sensors: The Hidden Party Animals in Your Apple Gear
Ever caught yourself wondering how your iPhone and Apple Watch seem to know every little thing you do? Whether you’re sprinting to catch your train, flipping your phone sideways to binge-watch your favorite show, or climbing stairs like you’re prepping for Everest, these clever little sensors know it all. Trust me — interviewers love grilling you about this stuff, so getting cozy with your device’s sensors now will make future you breathe easier.
Let’s introduce you to these tiny, built-in party animals and whip up a SwiftUI demo that brings their data right onto your screen. We’ll make sure to include those sneaky Info.plist entries you’ll need, too!
Meet Your Device’s Inner Crew
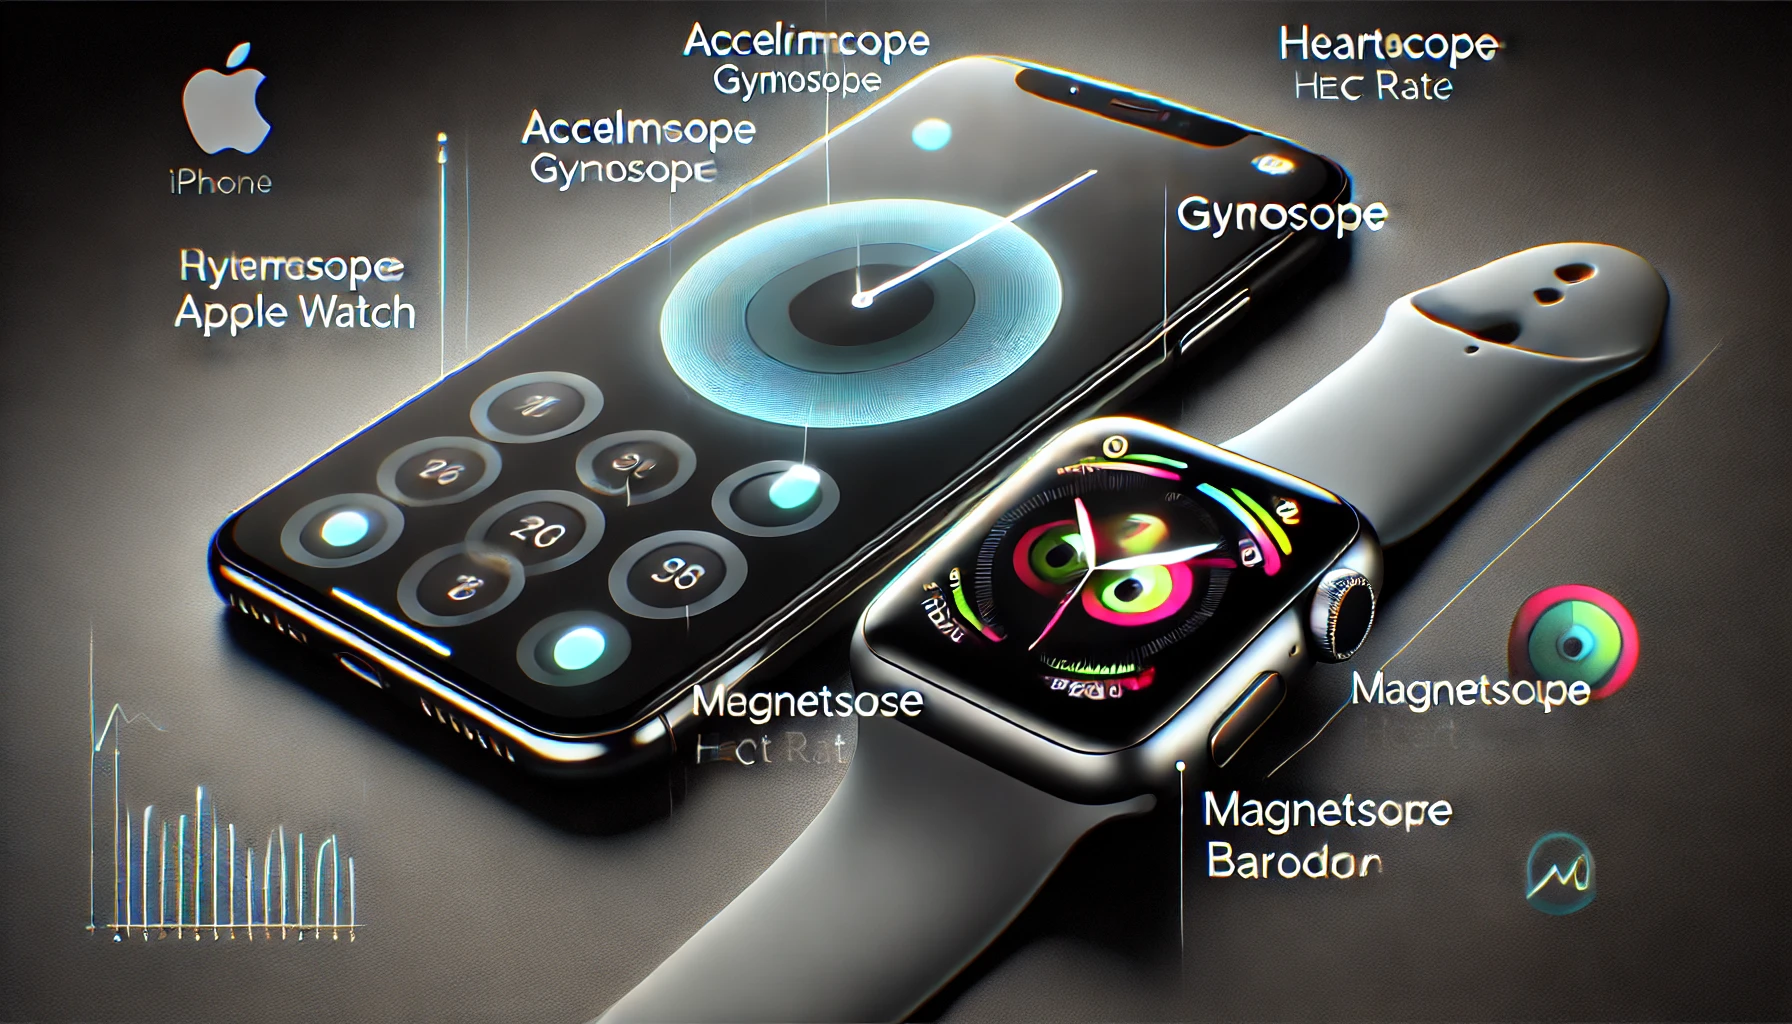
iPhone Sensors:
- Accelerometer: Detects your phone’s movements in three axes — ideal for fitness tracking or game development.
- Gyroscope: Measures rotation — perfect for smooth UI orientation changes.
- Magnetometer: Detects magnetic fields — this powers your compass app.
- Barometer: Measures altitude — ever wondered how your hiking app knows your elevation?
Apple Watch Exclusive Sensors:
- Heart Rate Sensor: Tracks your pulse during workouts or those high-stress meetings.
- Blood Oxygen Sensor (SpO₂): Monitors your blood oxygen — straight outta Star Trek.
- Electrocardiogram (ECG): Gives you a quick heart rhythm checkup directly from your wrist.
Building the Ultimate Sensor Dashboard in SwiftUI
Let’s get coding. But first, some quick housekeeping:
Update Your Info.plist
Add these permissions to your project’s Info.plist to keep things smooth:
<key>NSMotionUsageDescription</key>
<string>This app uses motion data to display sensor info.</string>
<key>NSHealthShareUsageDescription</key>
<string>This app reads health data to show heart rate, ECG, and blood oxygen levels.</string>
<key>NSHealthUpdateUsageDescription</key>
<string>This app uses health data to monitor vital signs.</string>
- NSMotionUsageDescription: Required for motion sensors (accelerometer, gyroscope, magnetometer, barometer).
- NSHealthShareUsageDescription & NSHealthUpdateUsageDescription: Needed for HealthKit access.
SwiftUI & Core Motion (Accelerometer, Gyroscope, Magnetometer, Barometer)
SensorManager.swift
import SwiftUI
import CoreMotion

@Observable
class SensorManager {
    private let motion = CMMotionManager()
    private let altimeter = CMAltimeter()

    var acceleration = CMAcceleration()
    var rotationRate = CMRotationRate()
    var magneticField = CMMagneticField()
    var altitude: Double = 0.0
    var pressure: Double = 0.0

    init() {
        startMotionUpdates()
        startAltimeterUpdates()
    }

    private func startMotionUpdates() {
        if motion.isAccelerometerAvailable {
            motion.accelerometerUpdateInterval = 1.0 / 30.0
            motion.startAccelerometerUpdates(to: .main) { [weak self] data, _ in
                self?.acceleration = data?.acceleration ?? CMAcceleration()
            }
        }

        if motion.isGyroAvailable {
            motion.gyroUpdateInterval = 1.0 / 30.0
            motion.startGyroUpdates(to: .main) { [weak self] data, _ in
                self?.rotationRate = data?.rotationRate ?? CMRotationRate()
            }
        }

        if motion.isMagnetometerAvailable {
            motion.magnetometerUpdateInterval = 1.0 / 30.0
            motion.startMagnetometerUpdates(to: .main) { [weak self] data, _ in
                self?.magneticField = data?.magneticField ?? CMMagneticField()
            }
        }
    }

    private func startAltimeterUpdates() {
        if CMAltimeter.isRelativeAltitudeAvailable() {
            altimeter.startRelativeAltitudeUpdates(to: .main) { [weak self] data, _ in
                self?.altitude = data?.relativeAltitude.doubleValue ?? 0.0
                self?.pressure = data?.pressure.doubleValue ?? 0.0
            }
        }
    }
}
What’s happening here?
- Initializes the accelerometer, gyroscope, magnetometer, and barometer sensors.
- Updates each sensor’s data every ~1/30th of a second.
- Publishes sensor values to SwiftUI views using the @Observable macro.
SwiftUI & HealthKit (Heart Rate, Blood Oxygen, ECG)
HealthManager.swift
import SwiftUI
import HealthKit

@Observable
class HealthManager {
    private let healthStore = HKHealthStore()
    var heartRate: Double = 0.0
    var bloodOxygen: Double = 0.0
    var ecgClassification: String = "N/A"

    init() {
        requestAuthorization()
    }

    private func requestAuthorization() {
        let types: Set = [
            HKQuantityType(.heartRate),
            HKQuantityType(.oxygenSaturation),
            HKObjectType.electrocardiogramType()
        ]

        healthStore.requestAuthorization(toShare: nil, read: types) { success, _ in
            if success {
                self.fetchLatestHealthData()
            }
        }
    }

    private func fetchLatestHealthData() {
        fetchMostRecent(for: .heartRate, unit: HKUnit(from: "count/min")) { rate in
            self.heartRate = rate
        }

        fetchMostRecent(for: .oxygenSaturation, unit: HKUnit.percent()) { spO2 in
            self.bloodOxygen = spO2 * 100
        }

        let ecgType = HKObjectType.electrocardiogramType()
        let query = HKSampleQuery(sampleType: ecgType, predicate: nil, limit: 1, sortDescriptors: [.init(keyPath: \HKSample.startDate, ascending: false)]) { _, samples, _ in
            if let ecg = samples?.first as? HKElectrocardiogram {
                DispatchQueue.main.async {
                    self.ecgClassification = ecg.classification.rawValue
                }
            }
        }
        healthStore.execute(query)
    }

    private func fetchMostRecent(for identifier: HKQuantityTypeIdentifier, unit: HKUnit, completion: @escaping (Double) -> Void) {
        guard let sampleType = HKQuantityType(identifier) else { return }
        let query = HKSampleQuery(sampleType: sampleType, predicate: nil, limit: 1, sortDescriptors: [.init(keyPath: \HKSample.startDate, ascending: false)]) { _, samples, _ in
            guard let sample = samples?.first as? HKQuantitySample else { return }
            DispatchQueue.main.async {
                completion(sample.quantity.doubleValue(for: unit))
            }
        }
        healthStore.execute(query)
    }
}
What’s happening here?
- Requests user authorization to read HealthKit data (heart rate, SpO₂, ECG).
- Fetches the most recent data points for each health metric.
- Publishes the health data to SwiftUI views.
The SwiftUI Sensor Dashboard
Finally, tie everything together:
import SwiftUI
struct SensorDashboard: View {
@State private var sensorManager = SensorManager()
@State private var healthManager = HealthManager()
var body: some View {
NavigationStack {
List {
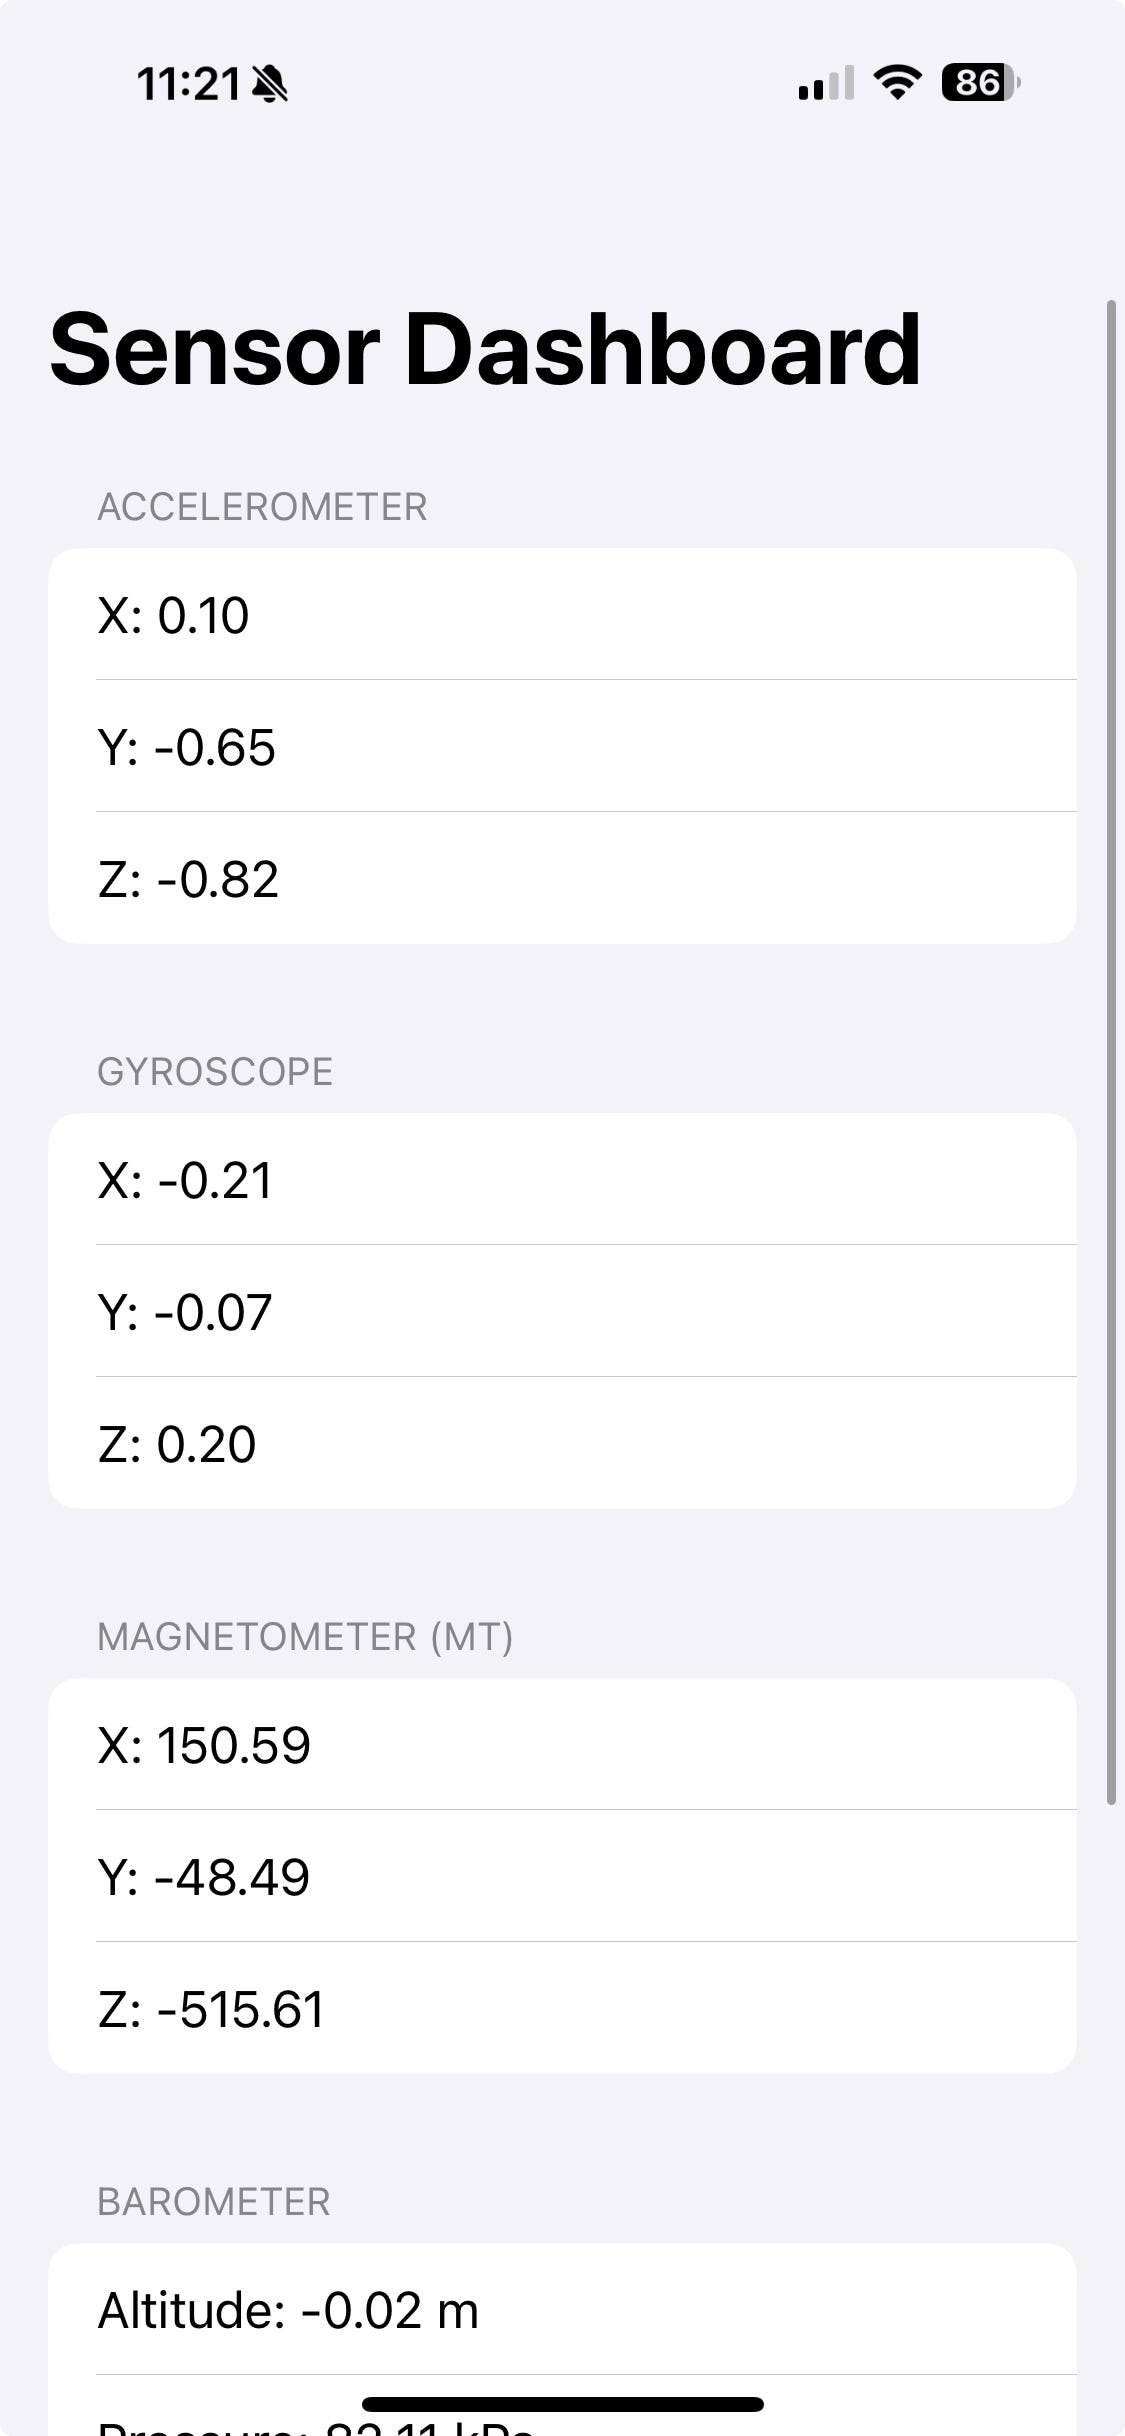
Section("Accelerometer") {
Text("X: \(sensorManager.acceleration.x, specifier: "%.2f")")
Text("Y: \(sensorManager.acceleration.y, specifier: "%.2f")")
Text("Z: \(sensorManager.acceleration.z, specifier: "%.2f")")
}
Section("Gyroscope") {
Text("X: \(sensorManager.rotationRate.x, specifier: "%.2f")")
Text("Y: \(sensorManager.rotationRate.y, specifier: "%.2f")")
Text("Z: \(sensorManager.rotationRate.z, specifier: "%.2f")")
}
Section("Magnetometer (µT)") {
Text("X: \(sensorManager.magneticField.x, specifier: "%.2f")")
Text("Y: \(sensorManager.magneticField.y, specifier: "%.2f")")
Text("Z: \(sensorManager.magneticField.z, specifier: "%.2f")")
}
Section("Barometer") {
Text("Altitude: \(sensorManager.altitude, specifier: "%.2f") m")
Text("Pressure: \(sensorManager.pressure, specifier: "%.2f") kPa")
}
Section("Apple Watch Sensors") {
Text("Heart Rate: \(healthManager.heartRate, specifier: "%.0f") bpm")
Text("Blood Oxygen: \(healthManager.bloodOxygen, specifier: "%.0f")%")
Text("ECG Classification: \(healthManager.ecgClassification)")
}
}
.navigationTitle("Sensor Dashboard")
}
}
What’s happening here?
- Displays sensor data clearly, updating live as data flows in.
- Structured neatly using sections for quick readability.
Wrapping it Up (Without Being Awkward)
Now you’ve got yourself an app that feels a bit like having X-ray vision into your devices. Sensors might seem tricky at first, but once you’ve got your hands dirty with the code, you’ll realize they’re just tiny tools waiting for you to do something awesome.
Next time an interviewer throws a curveball at you — like, “Hey, could you detect if someone just fell using their Apple Watch?” — you’ll grin, nod confidently, and explain exactly how you’d tackle it.
Go ahead, take this demo for a spin, tweak it, break it, rebuild it. Play with the data, maybe build a workout tracker, a funky augmented reality game, or even something as crazy as an app that guesses your mood based on how frantically you’re shaking your phone during debugging (been there, done that).
Whatever you do next, keep experimenting, keep building cool stuff, and rock your next interview like you’re headlining a Metallica show.
If you’re hungry for more tips, tricks, and a few battle-tested stories from the trenches of native mobile development, swing by my collection of articles: https://medium.com/@wesleymatlock.
These posts are packed with real-world solutions, some laughs, and the kind of knowledge that’s saved me from a few late-night debugging sessions. Let’s keep building apps that rock — and if you’ve got questions or stories of your own, drop me a line. I’d love to hear from you.
🔥 Keep exploring, and happy sensing! 📱⌚️✨
By Wesley Matlock on March 10, 2025.
Exported from Medium on May 10, 2025.