Ever been in a technical interview when the interviewer casually asks, “So how does Bluetooth pairing and data transfer actually work?” and…
Riding the Bluetooth Lightning: Connecting SwiftUI Apps to External Devices

Ever been in a technical interview when the interviewer casually asks, “So how does Bluetooth pairing and data transfer actually work?” and you suddenly feel like James Hetfield staring blankly at an unplugged amp? Yeah, we’ve all been there. Bluetooth seems simple until you dive under the hood, then things get gnarly pretty quick.
No worries though — today we’re cranking up the amps and diving headfirst into Bluetooth connectivity with CoreBluetooth in SwiftUI. We’ll break down exactly how Bluetooth communication happens, from discovering peripherals to pairing and sending data packets back and forth. And yes, we’ll do it while building a slick, fully-functional Bluetooth scanning app so you can connect to devices faster than Kirk rips through the “Master of Puppets” solo.
We’ll also sprinkle in solid unit tests — because let’s face it, an app crashing mid-connection is as tragic as Metallica losing the Best Metal Performance Grammy to Jethro Tull. By the end, you’ll not only know your CBPeripheral from your CBCentralManager but you’ll also be able to confidently answer those tricky Bluetooth questions in your next interview.
Ready to crank it up? Let’s get connected!
Setting Up Bluetooth Scanning in SwiftUI
Before we start blasting through code, let’s break down how Bluetooth Low Energy (BLE) devices communicate:
- Central & Peripheral Roles: Your iPhone acts as a central device that scans for peripheral devices (e.g., Bluetooth headphones, heart rate monitors, or even custom hardware).
- CBPeripheral & CBCentralManager: These are the CoreBluetooth classes that handle device discovery, connections, and data transfers.
- UUIDs & Services: Each Bluetooth device broadcasts a unique identifier and optional services that define what data can be exchanged.
Alright, enough theory — let’s get this thing built.
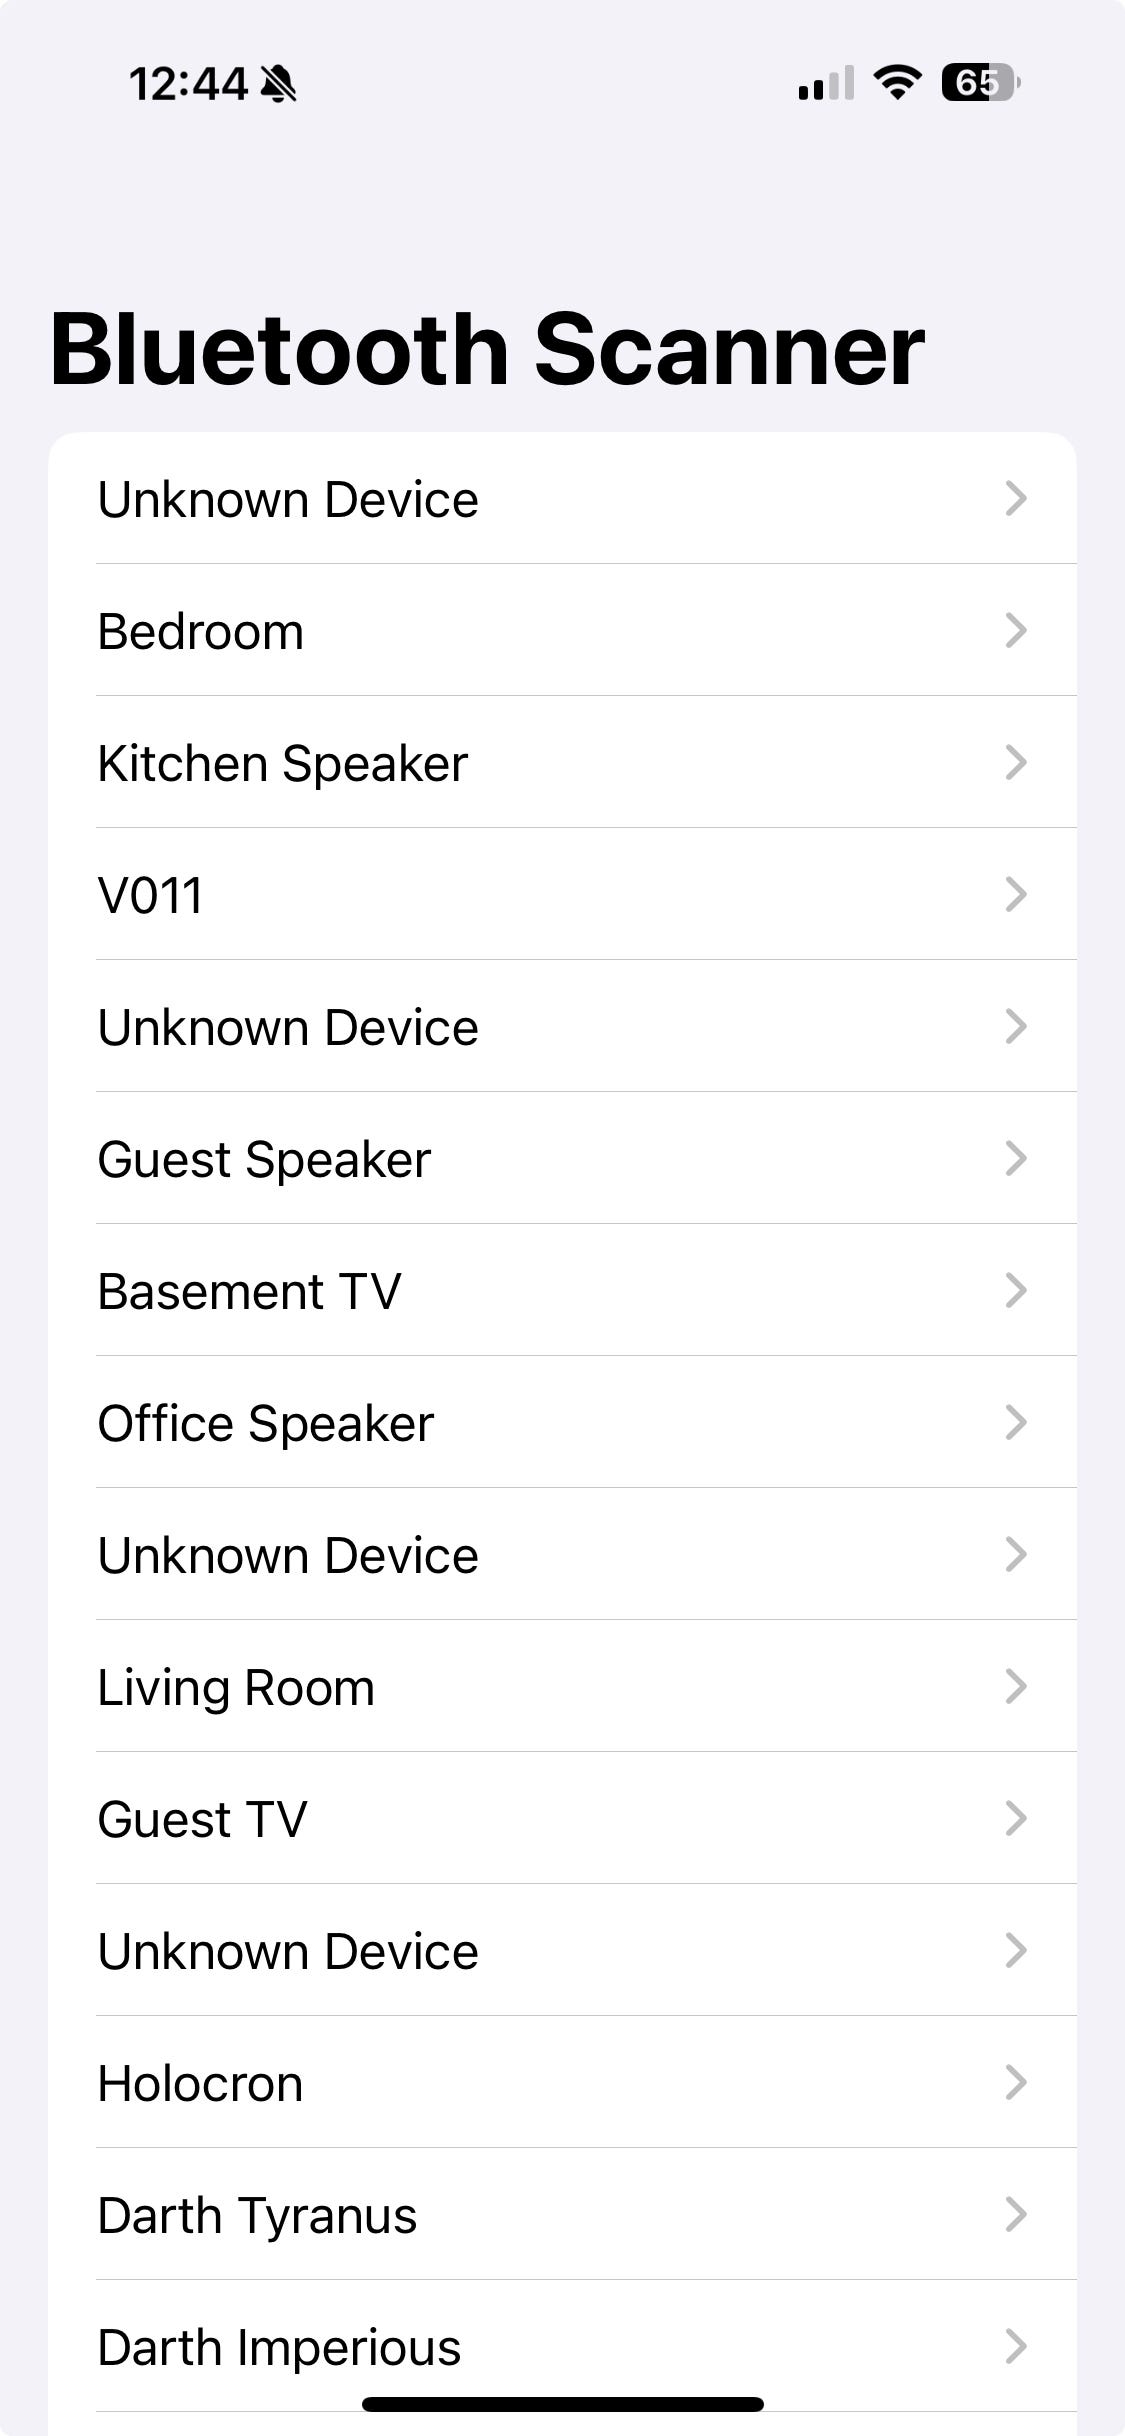
Building the Bluetooth Scanner App
We’ll build a SwiftUI app that:
- Uses CoreBluetooth to scan for nearby Bluetooth peripherals.
- Displays discovered devices in a SwiftUI List.
- Allows users to select a device and navigate to a details screen to see more Bluetooth metadata.
- Handles Bluetooth permissions correctly.
Step 1: Create the CoreBluetooth Manager
First, we need a BluetoothManager to handle all Bluetooth interactions. This will act as the brains of our scanner:
import Foundation
import CoreBluetooth

@Observable
final class BluetoothManager: NSObject, CBCentralManagerDelegate, CBPeripheralDelegate {
    var discoveredDevices: [CBPeripheral] = []
    var selectedDevice: CBPeripheral?
    private var centralManager: CBCentralManager!

    override init() {
        super.init()
        centralManager = CBCentralManager(delegate: self, queue: DispatchQueue.main)
    }

    func centralManagerDidUpdateState(_ central: CBCentralManager) {
        if central.state == .poweredOn {
            centralManager.scanForPeripherals(withServices: nil, options: nil)
        } else {
            print("Bluetooth is off or not available")
        }
    }

    func centralManager(_ central: CBCentralManager, didDiscover peripheral: CBPeripheral, advertisementData: [String : Any], rssi RSSI: NSNumber) {
        if !discoveredDevices.contains(peripheral) {
            discoveredDevices.append(peripheral)
        }
    }

    func connect(to peripheral: CBPeripheral) {
        selectedDevice = peripheral
        centralManager.stopScan()
        centralManager.connect(peripheral, options: nil)
    }
}
This class:
- Initializes a
CBCentralManagerinstance to handle Bluetooth operations and assigns the class itself as its delegate, allowing it to respond to Bluetooth state changes and device discoveries. - Starts scanning for Bluetooth peripherals as soon as Bluetooth is powered on by checking the state in the delegate method
centralManagerDidUpdateState. If Bluetooth is off or unavailable, it logs a message. - Implements the
centralManager(_:didDiscover:advertisementData:rssi:)delegate method to keep track of discovered peripherals, adding each unique peripheral to the publisheddiscoveredDevicesarray. - Provides a
connect(to:)method to stop scanning, select a specific peripheral from the discovered devices, and initiate a connection, preparing for further interaction like reading device services or characteristics.
Step 2: Create the SwiftUI Interface
Now, let’s create a simple SwiftUI View to display the discovered devices and allow selection:
import SwiftUI

struct BluetoothScannerView: View {
    private var bluetoothManager = BluetoothManager()
    @State private var selectedDevice: CBPeripheral?

    var body: some View {
        NavigationView {
            List(bluetoothManager.discoveredDevices, id: \ .identifier) { device in
                NavigationLink(destination: BluetoothDetailView(peripheral: device)) {
                    Text(device.name ?? "Unknown Device")
                        .onTapGesture {
                            selectedDevice = device
                            bluetoothManager.connect(to: device)
                        }
                }
            }
            .navigationTitle("Bluetooth Scanner")
        }
    }
}
This SwiftUI view:
- Displays each discovered Bluetooth device in a
List. - Navigates to
BluetoothDetailViewwhen a device is selected.
Step 3: Create the Bluetooth Details Screen
Now, let’s add a details screen to show all available Bluetooth metadata:
import SwiftUI
import CoreBluetooth

struct BluetoothDetailView: View {
    let peripheral: CBPeripheral

    var body: some View {
        VStack(alignment: .leading, spacing: 10) {
            Text("Device Name: \(peripheral.name ?? "Unknown")")
                .font(.headline)
            Text("Identifier: \(peripheral.identifier.uuidString)")
            Text("Services: \(peripheral.services?.count ?? 0)")
        }
        .padding()
        .navigationTitle("Device Details")
    }
}

Final Thoughts
And there you have it! A fully working Bluetooth scanner that not only detects devices but also lets you select one and view all its details. Now, the next time someone throws a Bluetooth question at you in an interview, you’ll be ready to shred through it like a Kirk Hammett solo.
If you’re hungry for more tips, tricks, and a few battle-tested stories from the trenches of native mobile development, swing by my collection of articles: https://medium.com/@wesleymatlock.
These posts are packed with real-world solutions, some laughs, and the kind of knowledge that’s saved me from a few late-night debugging sessions. Let’s keep building apps that rock — and if you’ve got questions or stories of your own, drop me a line. I’d love to hear from you.
🔥 Rock on, and happy scanning! 🎸⚡
By Wesley Matlock on March 6, 2025.
Exported from Medium on May 10, 2025.