Introduction: Building Like You’re on Stage
Ride the Lightning with SwiftUI Navigation for tvOS
Introduction: Building Like You’re on Stage
tvOS development isn’t just about moving users between screens — it’s about creating an experience that’s as immersive as a Metallica concert. With the Apple TV remote in hand, users expect intuitive navigation, smooth interactions, and a UI that feels alive. The challenge? Balancing simplicity with the unique capabilities of tvOS.
In this post, we’re building the Ride the Lightning Concert Archives app. This app will showcase tvOS navigation techniques, from mastering focus behaviors to handling remote-specific gestures using onMoveCommand. By the end, you’ll have a clear roadmap to craft an app that feels as epic as the intro riff to “Creeping Death.”
Setting the Stage: The App Concept
Here’s what our Ride the Lightning Concert Archives app will include:
- Centralizing the Album Data
- Creating the Album Detail View
- Album grid navigation with NavigationLink.
- Custom focus behaviors using @FocusState for spotlight albums.
- Track swiping for seamless navigation between tracks using onMoveCommand.
- UI tests to ensure everything works flawlessly with the remote.
1. Centralizing the Album Data
To keep our code clean and reusable, we should define our album data in one place instead of repeating it in every code snippet. This makes the code easier to maintain, avoids duplication, and allows all views to access the same album data.
We’ll store the album data separately in a global constant and reference it throughout the app.
import Foundation

// MARK: - Album Object
struct Album: Identifiable {
  let id = UUID()
  let title: String
  let cover: String
  let description: String
}

let albums = [
  Album(title: "Kill ‘Em All", cover: "kill_em_all", description: "Where it all began."),
  Album(title: "Ride the Lightning", cover: "ride_the_lightning", description: "The album that made Metallica legends."),
  Album(title: "Master of Puppets", cover: "master_of_puppets", description: "A thrash masterpiece."),
  Album(title: "And Justice For All", cover: "and_justice_for_all", description: "Nearly inaudible bass guitar."),
  Album(title: "Black Album", cover: "black_album", description: "Metallica's first album to top the album charts."),
  Album(title: "Garage, Inc", cover: "garage_inc", description: "A compilation album of cover songs."),
  Album(title: "Load", cover: "load", description: "Groove metal meets experimentation."),
  Album(title: "Reload", cover: "reload", description: "Experimental thrash."),
  Album(title: "St. Anger", cover: "st_anger", description: "The album was written with \"a lot of passion\""),
  Album(title: "Death Magnetic", cover: "death_magnetic", description: "Metallica the first band to achieve five consecutive number-one studio albums on the U.S."),
  Album(title: "Hardwired... to Self-Destruct", cover: "hardwired", description: "Modern thrash brilliance."),
  Album(title: "72 Seasons", cover: "72_seasons", description: "The first 18 years of our lives that form our true or false selves.")
]

let tracks = [
  ("Creeping Death", "Slaves, Hebrews born to serve, to the Pharaoh"),
  ("For Whom the Bell Tolls", "Take a look to the sky just before you die, it’s the last time you will"),
  ("Fade to Black", "I have lost the will to live, simply nothing more to give"),
  ("Master of Puppets", "Taste me, you will see, more is all you need"),
  ("Enter Sandman", "Exit light, enter night, take my hand"),
  ("Battery", "Smashing through the boundaries, lunacy has found me"),
  ("Seek & Destroy", "Searching, seek and destroy!"),
  ("One", "Darkness imprisoning me, all that I see, absolute horror"),
  ("Sad But True", "I’m your truth, telling lies, I’m your reasoned alibi"),
  ("The Unforgiven", "What I’ve felt, what I’ve known, never shined through in what I’ve shown")
]
2. Creating the Album Detail View
Before we build the album grid, we need the destination screen where users will land when selecting an album.
Code Example: Album Detail View
import SwiftUI

struct AlbumDetailView: View {
  let album: Album

  var body: some View {
    ZStack {
      Color.black.ignoresSafeArea()

      VStack(spacing: 30) {
        Image(album.cover)
          .resizable()
          .scaledToFit()
          .frame(width: 400, height: 400)
          .cornerRadius(15)
          .shadow(radius: 10)

        Text(album.title)
          .font(.largeTitle)
          .foregroundColor(.white)

        Text(album.description)
          .font(.title3)
          .foregroundColor(.gray)
          .multilineTextAlignment(.center)
          .padding(.horizontal, 40)

        Button(action: {
          print("Playing \(album.title)...")
        }) {
          Text("Play Album")
            .font(.headline)
            .padding()
            .frame(width: 250, height: 60)
            .background(Color.blue)
            .foregroundColor(.white)
            .cornerRadius(10)
            .shadow(radius: 5)
        }
        .focusable()
      }
    }
  }
}

#Preview {
  AlbumDetailView(
    album: Album(
      title: "Ride the Lightning",
      cover: "ride_the_lightning",
      description: "The album that made Metallica legends."
    )
  )
}
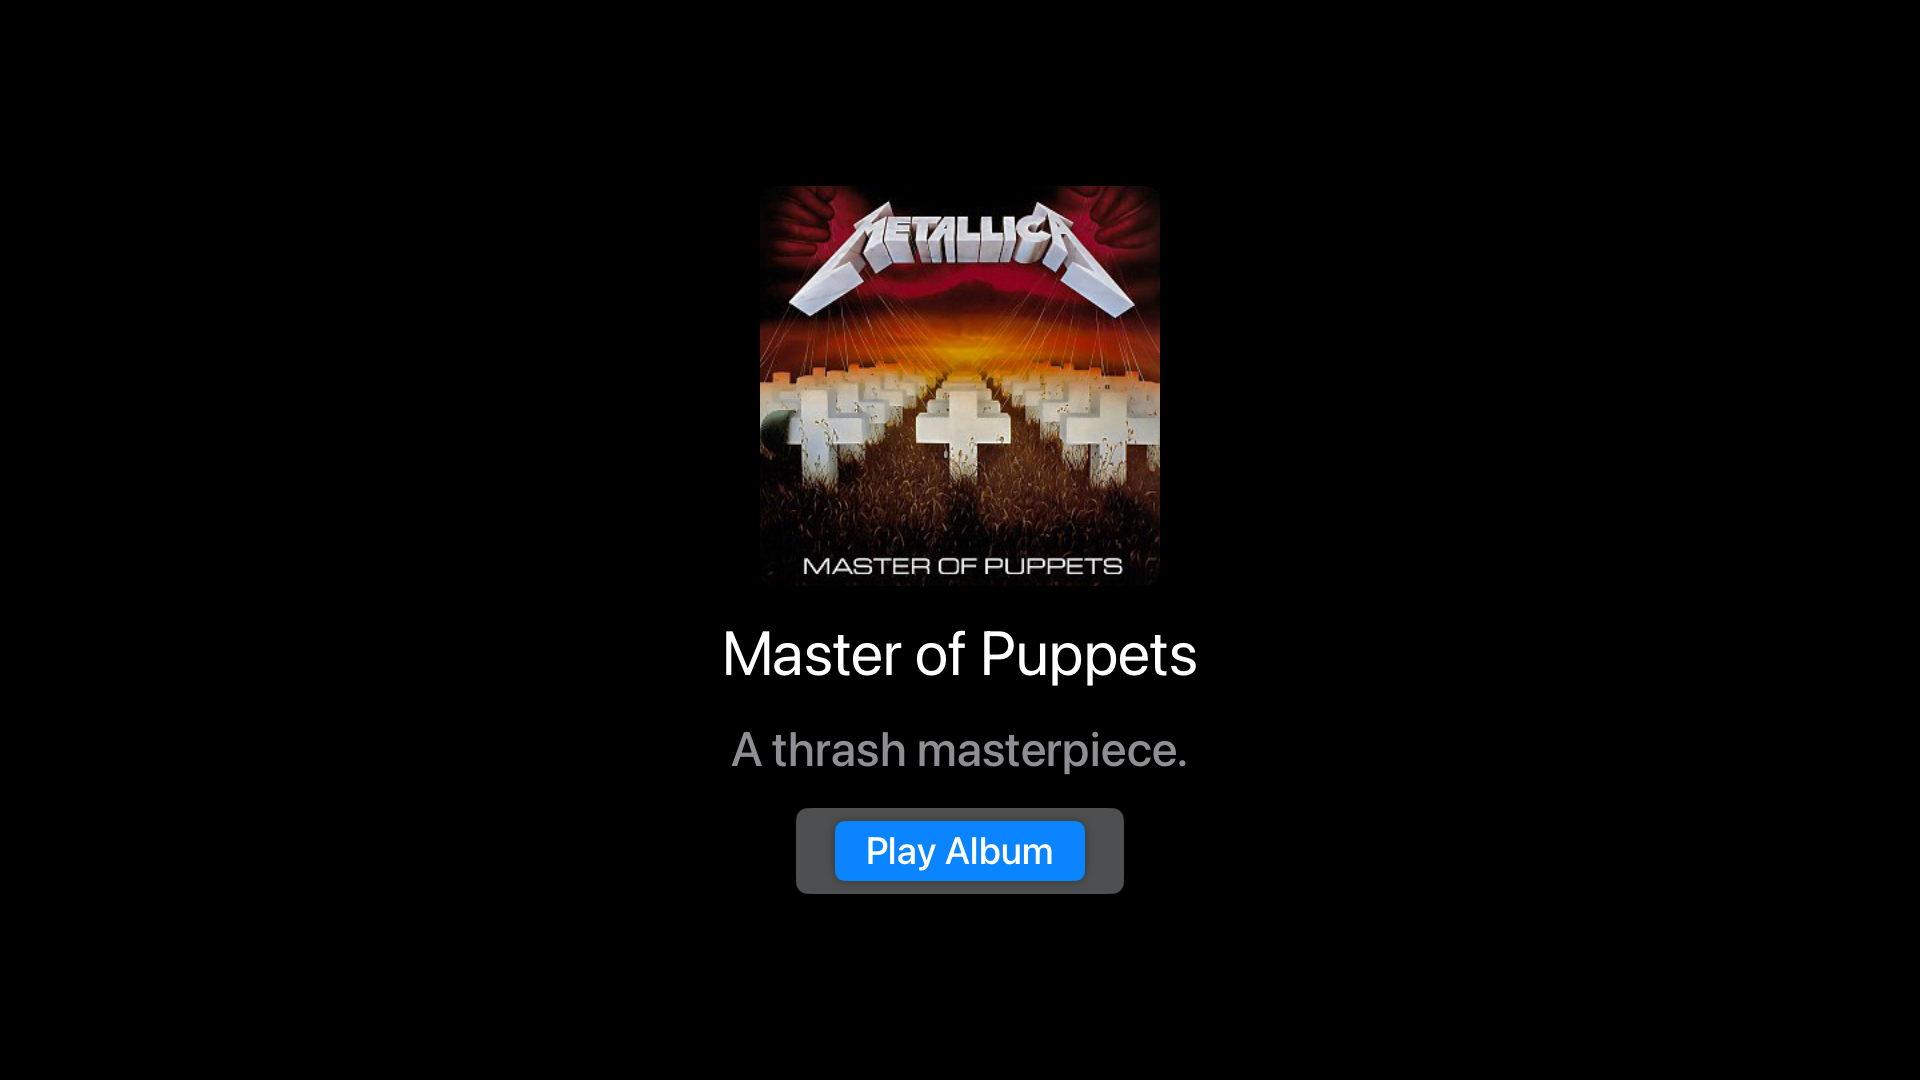
Why This Works Well for tvOS
- Fullscreen Background for a more immersive look.
- Large Album Cover that scales well on Apple TV screens.
- Focusable Button using .focusable(), making it remote-friendly.
3. Album Grid Navigation with NavigationLink
NavigationLink is your bread and butter for navigation. In tvOS, focus management is baked in, but enhancing it with a polished UI can elevate the user experience.
Code Example: NavigationLink Grid
import SwiftUI

struct AlbumGridView: View {

  var body: some View {
    NavigationView {
      ScrollView(.horizontal) {
        HStack(spacing: 30) {
          ForEach(albums) { album in
            NavigationLink(destination: AlbumDetailView(album: album)) {
              VStack {
                Image(album.cover)
                  .resizable()
                  .scaledToFit()
                  .frame(width: 250, height: 250)
                  .cornerRadius(12)
                Text(album.title)
                  .font(.headline)
                  .foregroundColor(.white)
              }
              .padding()
              .background(
                RoundedRectangle(cornerRadius: 15)
                  .fill(Color.black.opacity(0.8))
              )
              .shadow(color: .white.opacity(0.3), radius: 5)
            }
          }
        }
        .padding(.horizontal, 20)
      }
      .navigationTitle("Album Archives")
    }
  }
}
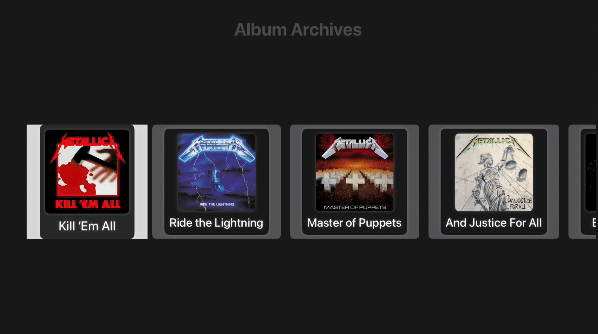
Key Points
- Focus-Friendly Design: tvOS highlights the first NavigationLink automatically, ensuring a smooth start for users.
- Dynamic Grid: ScrollView combined with HStack creates a responsive grid for horizontal navigation.
- Polished Visuals: Shadows and rounded corners add a premium, TV-ready look.
4. Advanced Focus Management
Focus is central to tvOS interaction. Using @FocusState, we can dynamically control what’s highlighted, creating a more immersive experience for users.
Code Example: Spotlight Albums with Dynamic Focus
import SwiftUI

struct SpotlightAlbumView: View {
  @FocusState private var focusedAlbum: UUID?
  @State private var currentAlbum: Album?

  var body: some View {
    ZStack {
      Color.black.ignoresSafeArea()

      VStack(spacing: 40) {
        ScrollView(.horizontal, showsIndicators: false) {
          HStack(spacing: 40) {
            ForEach(albums) { album in
              Image(album.cover)
                .scaledToFit()
                .frame(width: 300, height: 300)
                .cornerRadius(15)
                .focusable(true)
                .focused($focusedAlbum, equals: album.id)
                .overlay(
                  RoundedRectangle(cornerRadius: 15)
                    .stroke(focusedAlbum == album.id ? Color.white : Color.clear, lineWidth: 4)
                )
                .animation(.spring(), value: focusedAlbum)
            }
          }
          .padding(.horizontal, 40)
        }
        .frame(height: 500)
        Text("\(currentAlbum?.title ?? "No Title or Album")")
          .foregroundColor(.white)
      }
      .onAppear {
        focusedAlbum = albums.first?.id
        updateCurrentAlbum(uuid:  albums.first?.id)
      }
    }
    .onChange(of: focusedAlbum) { oldUUID, newUUID in
      guard let newUUID else {
        currentAlbum = nil
        return
      }
      updateCurrentAlbum(uuid: newUUID)
    }
  }

  private func updateCurrentAlbum(uuid: UUID?) {
    guard let uuid else {
      currentAlbum = nil
      return
    }
    let album = albums.first(where: { $0.id == uuid })
    currentAlbum = album
  }
}

#Preview {
  SpotlightAlbumView()
}
Why It Rocks
- Dynamic Feedback: Scaling the focused album cover provides immediate visual feedback.
- Custom Focus: Users always know where they are in the UI, thanks to @FocusState.
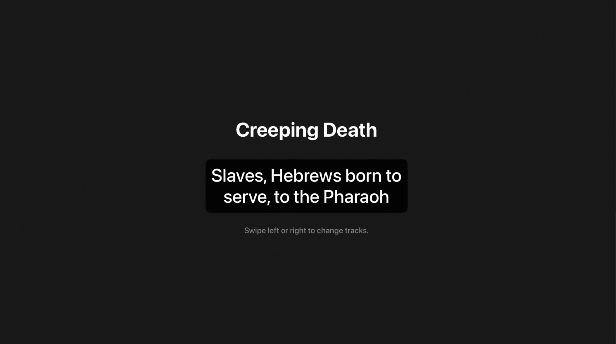
5. Handling Remote-Specific Gestures with onMoveCommand
Since tvOS doesn’t support DragGesture, we’ll use onMoveCommand to handle remote swipes. This is perfect for navigating between tracks.
Code Example: Swipe Navigation Using onMoveCommand
import SwiftUI

#if os(tvOS)
struct TrackSwipeView: View {
  @State private var currentTrack = 0

  var body: some View {
    VStack(spacing: 40) {
      Text(tracks[currentTrack].0)
        .font(.largeTitle)
        .bold()
        .padding()

      Text(tracks[currentTrack].1)
        .font(.title2)
        .foregroundColor(.white)
        .frame(width: 600)
        .multilineTextAlignment(.center)
        .truncationMode(.tail)
        .padding()
        .background(
          RoundedRectangle(cornerRadius: 15)
            .fill(Color.black.opacity(0.8))
        )
        .shadow(radius: 5)

      Text("Swipe left or right to change tracks.")
        .font(.caption)
        .foregroundColor(.gray)
    }
    .padding()
    .focusable()
    .onMoveCommand(perform: handleMove)
  }

  private func handleMove(_ direction: MoveCommandDirection) {
    switch direction {
    case .right:
      currentTrack = min(currentTrack + 1, tracks.count - 1)
      print("Switched to: \(tracks[currentTrack].0)")
    case .left:
      currentTrack = max(currentTrack - 1, 0)
      print("Switched to: \(tracks[currentTrack].0)")
    default:
      break
    }

}

#Preview {
  TrackSwipeView()
}

#endif
Key Insights
- onMoveCommand: Handles left and right swipes with precision, offering a seamless navigation experience.
- State Management: @State keeps track of the currently selected track and updates dynamically.
6. UI Testing for tvOS
No app is complete without solid testing. Here’s a sample XCTest to verify that navigation works with the Apple TV remote:
Code Example: UI Test for Album Navigation
  @Test func testAlbumNavigation() {
    let albumGridView = AlbumGridView()

    let firstAlbum = albumGridView.images["ride_the_lightning"]
    #expect(firstAlbum.hasFocus == true , "Expected the first album to have focus")

    firstAlbum.tap()
    #expect(app.staticTexts["Ride the Lightning"].exists), "Expected to be on the detail screen")
  }
Outro: Bringing the Noise
With these techniques, you’re not just building tvOS apps — you’re creating experiences. Focus handling, remote-specific gestures, and solid UI design are your tools to rock the stage. Now, go channel your inner Hammett and build something legendary.
If you’re hungry for more tips, tricks, and a few battle-tested stories from the trenches of native mobile development, swing by my collection of articles: https://medium.com/@wesleymatlock.
These posts are packed with real-world solutions, some laughs, and the kind of knowledge that’s saved me from a few late-night debugging sessions. Let’s keep building apps that rock — and if you’ve got questions or stories of your own, drop me a line. I’d love to hear from you.
By Wesley Matlock on January 30, 2025.
Exported from Medium on May 10, 2025.