SwiftUI has transformed UI development across Apple platforms with its declarative syntax and powerful preview capabilities. With the…
How to Use SwiftUI’s Preview Content with the #Preview Macro
SwiftUI has transformed UI development across Apple platforms with its declarative syntax and powerful preview capabilities. With the introduction of Swift 5.9, Xcode 15, and iOS 17, new features like the #Preview macro and enhanced Canvas settings have further streamlined the developer experience. In this article, we’ll explore how to effectively use SwiftUI’s Preview Content, including the Preview Content group and Preview Assets.xcassets, to create rich and efficient UI previews. We’ll also delve into optimizing your preview resources and using the Canvas Device Picker to test your UI across various devices.
Understanding SwiftUI’s Preview Content
Preview Content allows you to supply sample data and assets exclusively for SwiftUI previews. By isolating these resources, you prevent them from being included in your app’s production build, keeping your app bundle lean and optimized. This approach enhances the development process by providing rich previews without cluttering your main app resources.
The Preview Content Group and Preview Assets.xcassets
• Preview Content Group: A designated group in your Xcode project where you store preview-specific resources like images and data files.
• Preview Assets.xcassets: An asset catalog within the Preview Content group that holds images and other assets used exclusively for previews.
These resources are accessible during SwiftUI preview rendering but are excluded from the compiled app when building for release.
Setting Up Preview Content in Xcode
- Create the Preview Content Group:
- In your Xcode project navigator, right-click on your project and select New Group.
- Name the group Preview Content.
- Add Preview Assets.xcassets:
- Right-click on the Preview Content group and select New File.
- Choose Asset Catalog and name it Preview Assets.xcassets.
- Add Sample Images:
- Import sample images into the Preview Assets.xcassets.
- For our recipe app, we’ll add images named carbonara and margherita.
- Add Sample Data:
- Right-click on the Preview Content group and select New File.
- Choose Empty and name it SampleRecipes.json.
- Add sample JSON data to this file.
Building a Simple Recipe Application
We’ll create a SwiftUI application that displays a list of recipes. We’ll use the Preview Content group, the #Preview macro, and explore Canvas device settings to enhance our development workflow.
Defining the Data Model
Create a new Swift file named Recipe.swift and define the Recipe struct:
import Foundation

struct Recipe: Identifiable, Decodable, Hashable {
  let id: UUID
  let name: String
  let imageName: String
  let ingredients: [String]
  let instructions: String
}
Note: We added Hashable conformance to the Recipe struct. This is necessary because when using value-based navigation APIs (NavigationLink(value:label:) and navigationDestination(for:content:)), the value type (Recipe in this case) must conform to Hashable.
Adding Sample Data
In SampleRecipes.json, add the following sample data:
[
  {
    "id": "550E8400-E29B-41D4-A716-446655440000",
    "name": "Spaghetti Carbonara",
    "imageName": "carbonara",
    "ingredients": ["Spaghetti", "Eggs", "Pancetta", "Parmesan Cheese", "Black Pepper"],
    "instructions": "Cook spaghetti. In a separate bowl, beat eggs and mix with cheese..."
  },
  {
    "id": "660E8400-E29B-41D4-A716-446655440000",
    "name": "Margherita Pizza",
    "imageName": "margherita",
    "ingredients": ["Pizza Dough", "Tomato Sauce", "Mozzarella Cheese", "Basil Leaves"],
    "instructions": "Spread tomato sauce on dough, add cheese and basil, bake in oven..."
  }
]
Loading Preview Data
Create a new Swift file named DataLoader.swift and implement the DataLoader struct:
struct DataLoader {
  static func loadSampleRecipes() -> [Recipe] {
    // Iterate over all bundles to find the one containing the resource
    for bundle in Bundle.allBundles {
      if let url = bundle.url(forResource: "SampleRecipes", withExtension: "json") {
        do {
          let data = try Data(contentsOf: url)
          let recipes = try JSONDecoder().decode([Recipe].self, from: data)
          return recipes
        } catch {
          fatalError("Failed to decode SampleRecipes.json: \(error)")
        }
      }
    }
    fatalError("SampleRecipes.json not found in any bundle.")
  }
}
Explanation:
• Iterating Over Bundles: The DataLoader checks each available bundle to find SampleRecipes.json. During previews, the preview bundle includes the Preview Content resources.
• No Helper Class Needed: This method eliminates the need for a helper class to access the correct bundle.
Accessing Preview Assets
When referencing images in your SwiftUI views, you can use the default image initializer:
Image(recipe.imageName)
  .resizable()
  .frame(width: 50, height: 50)
  .cornerRadius(5)
Note: During previews, SwiftUI searches all available bundles for image assets, including the preview bundle containing Preview Assets.xcassets.
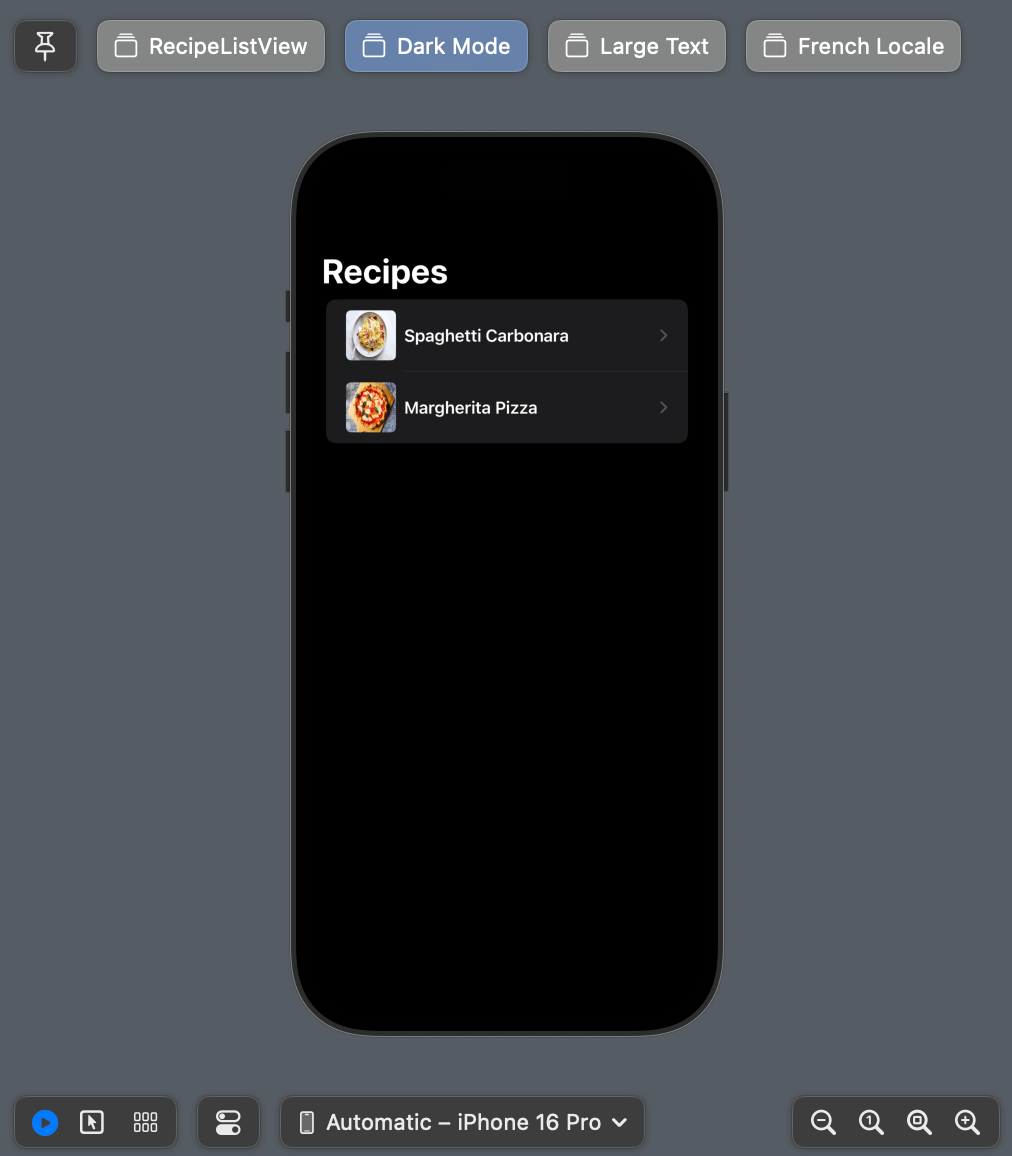
Building the RecipeListView
Create a new SwiftUI View named RecipeListView.swift:
import SwiftUI

struct RecipeListView: View {
  let recipes: [Recipe]

  var body: some View {
    NavigationStack {
      List(recipes) { recipe in
        NavigationLink(value: recipe) {
          HStack {
            Image(recipe.imageName)
              .resizable()
              .frame(width: 50, height: 50)
              .cornerRadius(5)
            Text(recipe.name)
              .font(.headline)
          }
        }
      }
      .navigationTitle("Recipes")
      .navigationDestination(for: Recipe.self) { recipe in
        RecipeDetailView(recipe: recipe)
      }
    }
  }
}
Explanation:
• NavigationStack: Manages the navigation hierarchy.
• NavigationLink(value:label:): Navigates to a destination based on a value.
• navigationDestination(for:content:): Defines the destination view for a given value type (Recipe).
Creating the RecipeDetailView
Create a new SwiftUI View named RecipeDetailView.swift:
import SwiftUI

struct RecipeDetailView: View {
  let recipe: Recipe

  var body: some View {
    ScrollView {
      VStack(alignment: .leading) {
        Image(recipe.imageName)
          .resizable()
          .scaledToFit()
        Text("Ingredients")
          .font(.title2)
          .padding(.top)
        ForEach(recipe.ingredients, id: \.self) { ingredient in
          Text("• \(ingredient)")
        }
        Text("Instructions")
          .font(.title2)
          .padding(.top)
        Text(recipe.instructions)
          .padding(.top, 5)
      }
      .padding()
    }
    .navigationTitle(recipe.name)
  }
}

#Preview("Spaghetti Carbonara") {
  RecipeDetailView(recipe: DataLoader.loadSampleRecipes()[0])
}

#Preview("Margherita Pizza") {
  RecipeDetailView(recipe: DataLoader.loadSampleRecipes()[1])
}
Customizing Previews
You can customize previews to simulate different environments:
#Preview {
  RecipeListView(recipes: DataLoader.loadSampleRecipes())
}

#Preview("Dark Mode") {
  RecipeListView(recipes: DataLoader.loadSampleRecipes())
    .environment(\.colorScheme, .dark)
}

#Preview("Large Text") {
  RecipeListView(recipes: DataLoader.loadSampleRecipes())
    .environment(\.sizeCategory, .accessibilityExtraLarge)
}
Optimizing Preview Resources
Optimizing your preview assets is crucial for ensuring that your previews load quickly and efficiently. Large or unoptimized assets can slow down the rendering of previews, affecting your development workflow.
Tips for Optimizing Preview Assets
- Use Appropriate Image Formats:
- JPEG: Suitable for photographs and images with complex colors.
- PNG: Ideal for images requiring transparency.
- SVG: Scalable Vector Graphics are excellent for icons and simple graphics.
- Compress Images:
- Use image compression tools to reduce the file size without significantly affecting quality.
- Tools like ImageOptim, TinyPNG, or Squoosh can help compress images efficiently.
- Limit Image Dimensions:
- Use images that are appropriately sized for the devices you’re targeting.
- Avoid using excessively large images that will be scaled down significantly.
- Use Vector Assets When Possible:
- For icons and simple graphics, prefer vector assets that scale smoothly across different resolutions.
- Organize Assets:
- Keep your Preview Assets.xcassets catalog organized.
- Remove any unused assets to keep the catalog clean.
- Lazy Loading:
- In your code, ensure that assets are loaded efficiently.
- Use SwiftUI’s built-in optimizations, such as AsyncImage, if applicable.
Benefits of Optimized Assets
- Faster Preview Rendering: Smaller assets load more quickly, making your previews snappier.
- Reduced Memory Usage: Optimized assets consume less memory, which is beneficial for both previews and the app’s performance.
- Improved Developer Experience: Faster previews lead to a smoother development workflow.
Accessing Canvas Device Settings
The Canvas in Xcode allows you to preview your SwiftUI views in real time. Understanding how to use the Canvas Device Picker enhances your ability to test your UI across different devices and configurations.
Selecting a Device
At the bottom of the Canvas, you’ll find the Device Picker. This allows you to select the device on which your preview will be displayed.
Device Picker in Canvas:
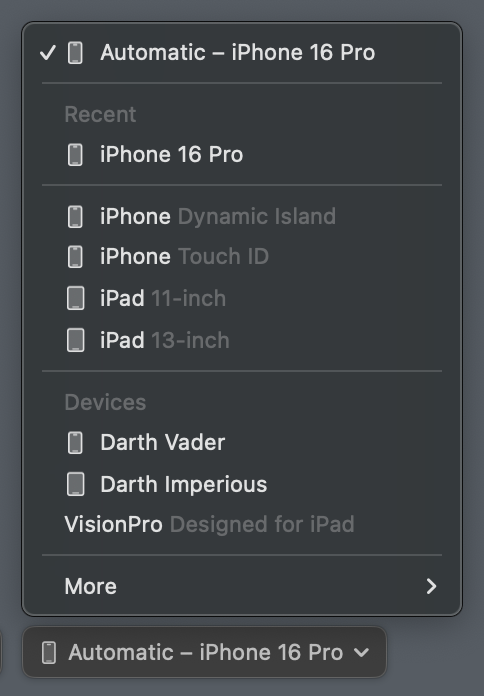
• Usage:
- Click on the device name (e.g., “iPhone 14”) to open a list of available devices.
- Scroll through the list to select the desired device.
• Available Devices:
- iPhones: Various models like iPhone SE, iPhone 14, iPhone 14 Pro Max.
- iPads: Models like iPad Air, iPad Pro (12.9-inch).
- Apple Watch: Different series and sizes.
- Macs: For macOS apps using SwiftUI.
• Customizing Devices:
- Add to Favorites: Click the star icon next to a device to add it to your favorites for quick access.
- Manage Devices: You can manage the list of devices by selecting Edit Devices from the bottom of the device list.
Adjusting Orientation and Color Scheme
Next to the Device Picker, you have options to adjust the orientation and color scheme.
• Orientation:
- Portrait: The default orientation for most devices.
- Landscape: Useful for testing layouts that adjust with orientation changes.
Changing Orientation:
- Click the orientation icon (a rectangle with arrows) to toggle between portrait and landscape.
• Color Scheme:
- Light Mode: The default appearance.
- Dark Mode: Essential for ensuring your UI looks good in dark environments.
Changing Color Scheme:
- Click the color scheme icon (a circle half-filled) to switch between light and dark modes.
Accessibility Settings
You can simulate different accessibility settings to test how your UI adapts.
• Dynamic Type Sizes:
- Adjust the text size to larger settings to ensure readability.
- Click the Text Size icon (an “A” with arrows) and select the desired text size.
• Accessibility Options:
- Bold Text: Simulate bold text setting.
- Reduce Motion: Test how your UI responds to reduced motion preferences.
- Increase Contrast: Ensure your UI maintains sufficient contrast.
Accessing Accessibility Options:
- Click the Settings icon (a gear) and select Accessibility to adjust these settings.
Live Previews and Interactivity
• Live Preview:
- By clicking the Play button (▶️) or pressing Option + Command + P, you can interact with your preview as if it’s running on a device.
- Live Preview allows you to navigate through your app, test animations, and interact with UI elements.
• Interactivity:
- Test navigation flows by tapping on buttons and links.
- Input text into fields to verify data handling.
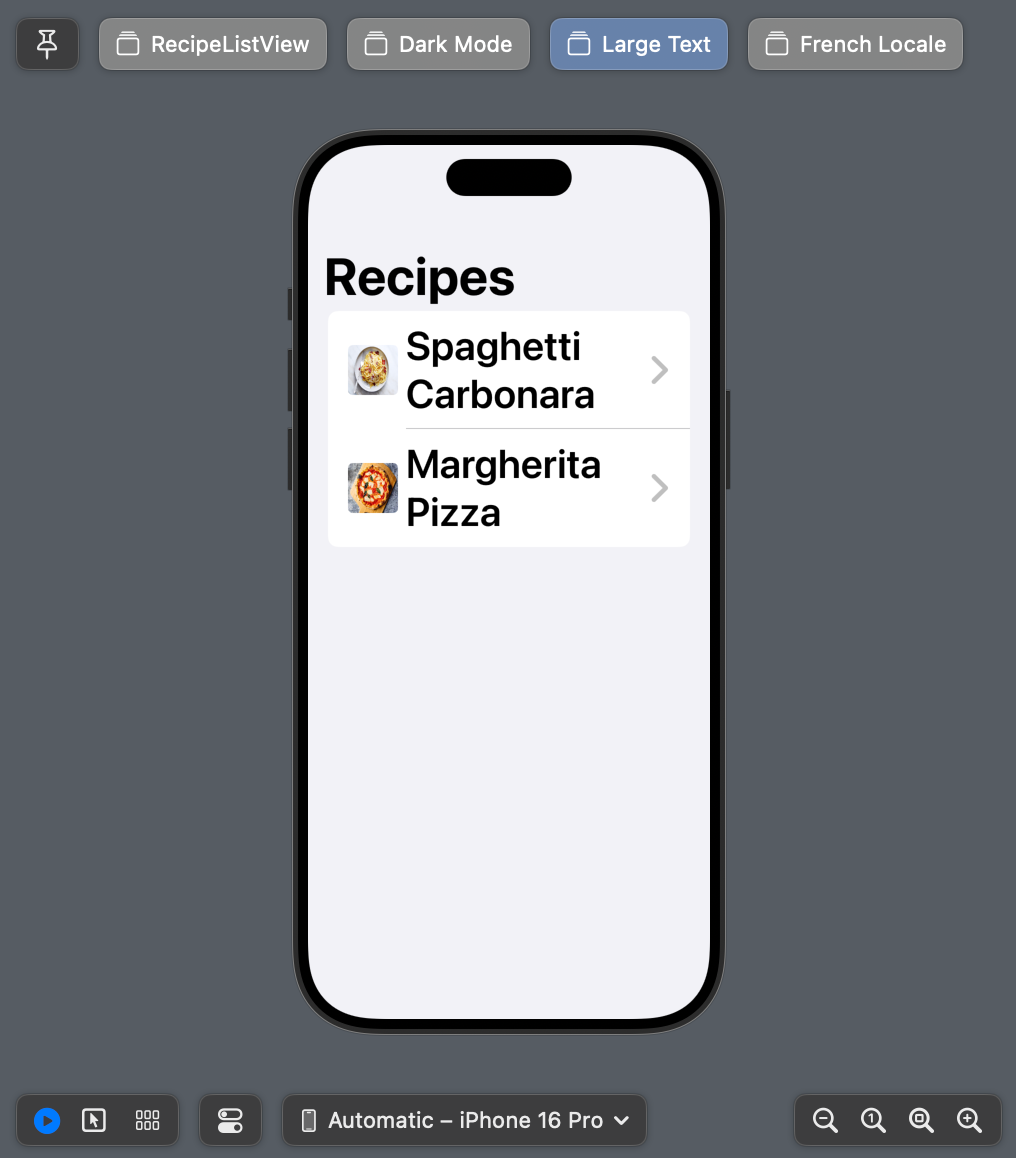
Preview Variations
You can display multiple previews side by side to compare different configurations.
#Preview("Light Mode") {
  RecipeListView(recipes: DataLoader.loadSampleRecipes())
}

#Preview("Dark Mode") {
  RecipeListView(recipes: DataLoader.loadSampleRecipes())
    .environment(\.colorScheme, .dark)
}
Viewing Multiple Previews:
- Xcode will display each #Preview macro result in the Canvas.
- You can see how your UI adapts to different settings simultaneously.
Adjusting Preview Layouts
While the #Preview macro doesn’t support previewDevice, you can adjust the size of your preview using frames:
#Preview("Custom Size") {
  RecipeListView(recipes: DataLoader.loadSampleRecipes())
    .frame(width: 320, height: 568) // iPhone SE size
}
Note: This simulates the layout but doesn’t emulate device-specific features.
How Preview Content Works Under the Hood
During SwiftUI previews, Xcode includes the Preview Content group in the preview bundle. By iterating over Bundle.allBundles, you can access this bundle to load resources like sample data and images.
• Iterating Over Bundles: Allows you to find resources in any available bundle, including the preview bundle during SwiftUI previews.
• No Helper Class Needed: This method avoids the need for a helper class or extending Bundle.
When you build your app for production, the Preview Content group is excluded, ensuring that these resources do not inflate your app’s size.
Advantages of Using Preview Content and the #Preview Macro
• Separation of Concerns: Keeps sample data and assets isolated from production code and resources.
• Efficient Development: Enables rapid UI iterations with real data representations without running the full app.
• Resource Management: Prevents unnecessary assets from increasing the app bundle size.
• Enhanced Previews: Provides a richer and more accurate preview experience, allowing for better design decisions.
• Simplified Preview Definitions: The #Preview macro reduces boilerplate code and allows for flexible preview configurations.
Advanced Techniques
Conditional Compilation
Use conditional compilation to include code only during development:
#if DEBUG
// Debug-only code
#endif
Custom Preview Modifiers
Create custom view modifiers for consistent preview configurations:
struct DarkModeModifier: ViewModifier {
  func body(content: Content) -> some View {
    content.environment(\.colorScheme, .dark)
  }
}

extension View {
  func darkMode() -> some View {
    modifier(DarkModeModifier())
  }
}

#Preview("Dark Mode") {
  RecipeListView(recipes: DataLoader.loadSampleRecipes())
    .darkMode()
}
Testing Localization
Preview your views in different locales:
#Preview("French Locale") {
  RecipeListView(recipes: DataLoader.loadSampleRecipes())
    .environment(\.locale, Locale(identifier: "fr"))
}
Additional Tips
Optimize Resources:
- Compress Images: Use tools like ImageOptim or TinyPNG to reduce image file sizes.
- Use Appropriate Formats: Select image formats that balance quality and size.
- Remove Unused Assets: Regularly clean up your Preview Assets.xcassets to keep it lean.
Lazy Loading: Ensure assets are loaded efficiently in your code to prevent unnecessary memory usage.
Avoid Large Data Files: If possible, use minimal sample data required for the preview.
Access Device Picker: Located at the bottom of the Canvas, allows quick switching between devices.
Test Multiple Devices: Regularly test your UI on different screen sizes and resolutions.
Simulate Different Environments: Combine device selection with orientation, color scheme, and accessibility settings.
Favorites: Add frequently used devices to your favorites for quicker access.
Stay Updated: Always refer to the latest Apple documentation and release notes for updates on SwiftUI, Swift, and Xcode features.
Test Thoroughly: Use multiple previews to test your UI under different conditions, such as varying device sizes, orientations, and accessibility settings.
Clean Build: If you encounter issues, try cleaning the build folder and rebuilding your project.
Conclusion
SwiftUI’s Preview Content and the #Preview macro significantly enhance the UI development workflow. By leveraging the Preview Content group and Preview Assets.xcassets, you can create detailed and accurate previews using real data and assets without affecting your production build. Accessing resources by iterating over Bundle.allBundles eliminates the need for helper classes and ensures that your sample data and assets are available during previews.
Incorporating these features into your development process leads to better-designed interfaces and a more streamlined coding experience.
By embracing SwiftUI’s evolving features and effectively using the Canvas, you can create modern, responsive, and visually appealing applications that provide an excellent user experience.
If you want to learn more about native mobile development, you can check out the other articles I have written here: https://medium.com/@wesleymatlock
🚀 Happy coding! 🚀
By Wesley Matlock on October 21, 2024.
Exported from Medium on May 10, 2025.