SwiftUI’s Layout protocol opens up a new world of possibilities for designing custom layouts. Whether you’re looking to arrange elements…
Custom Layouts in SwiftUI: A Deep Dive into the Layout ProtocolSwiftUI
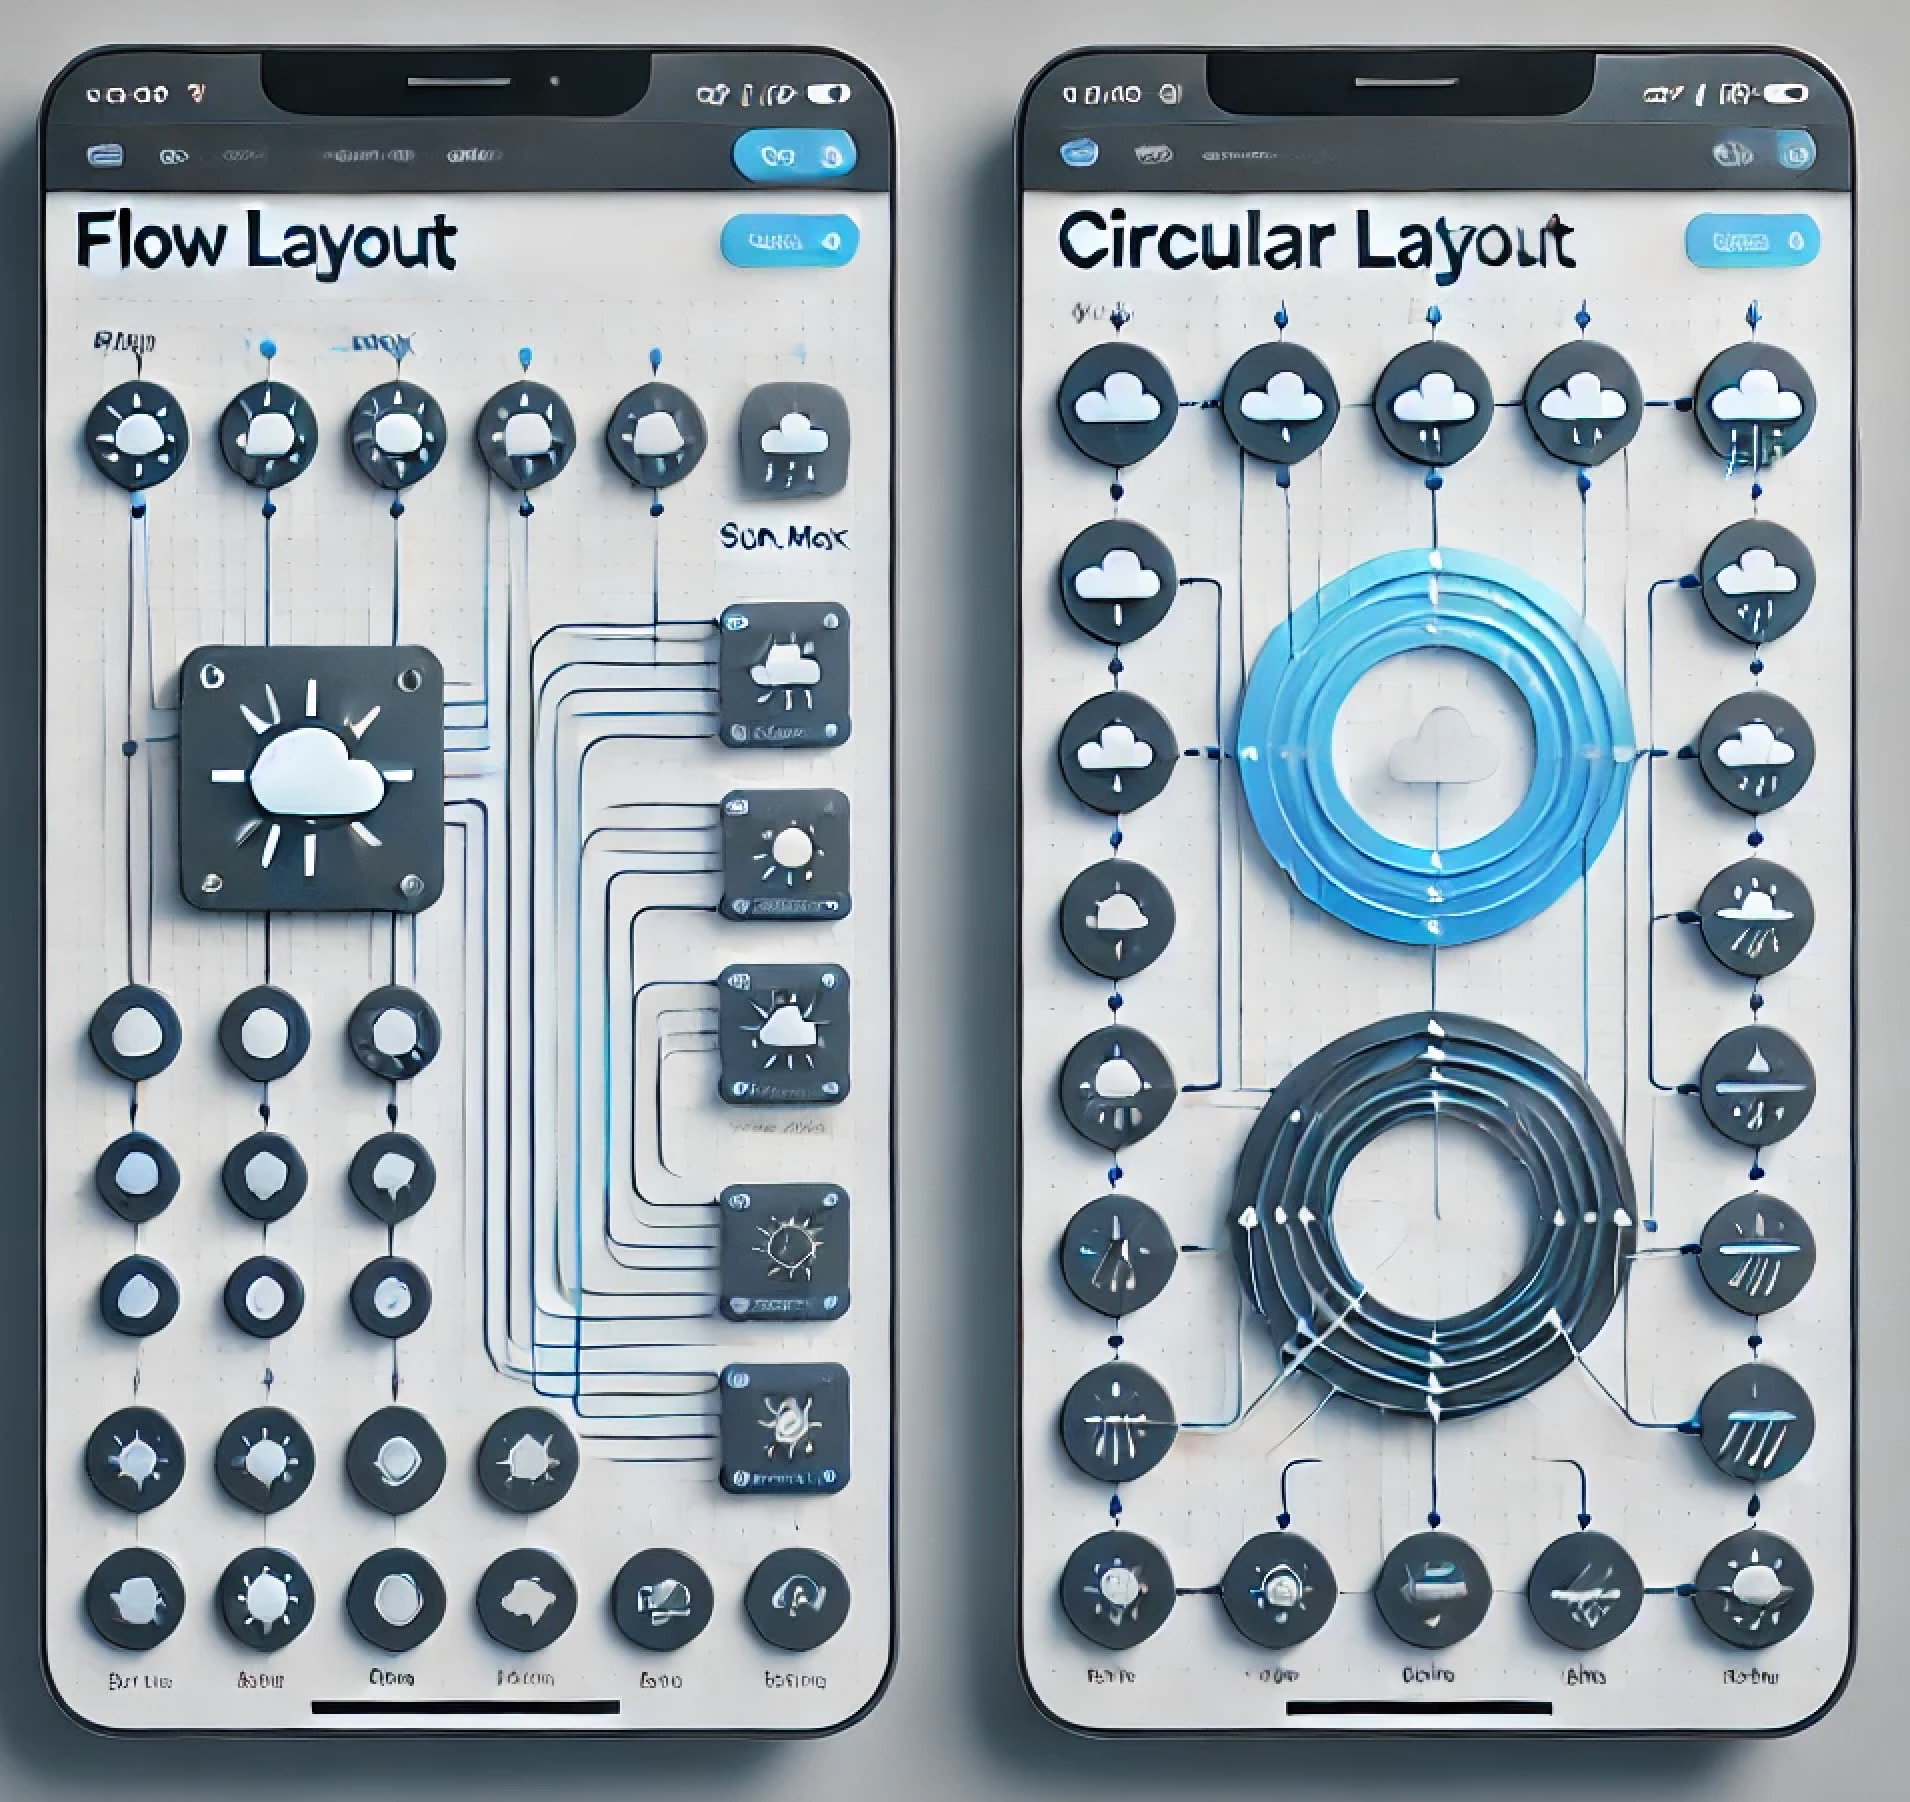
SwiftUI’s Layout protocol opens up a new world of possibilities for designing custom layouts. Whether you’re looking to arrange elements in a circular pattern or create a flow that wraps items dynamically, the Layout protocol provides the flexibility you need to build dynamic and visually appealing user interfaces. In this post, we’ll walk through building two custom layouts using the Layout protocol: CircularLayout and FlowLayout.
Introduction to the SwiftUI Layout Protocol
The Layout protocol in SwiftUI provides developers with the flexibility to create custom arrangements of views. It requires the implementation of two primary methods:
• sizeThatFits(proposal:subviews:cache:): Determines the size that best fits the proposed size and subviews.
• placeSubviews(in:proposal:subviews:cache:): Positions each subview within the given bounds.
Optionally, you can implement caching methods to optimize performance:
• makeCache(subviews:)
• updateCache(_:subviews:)
By leveraging these methods, you can create layouts that adapt to content and device sizes dynamically.
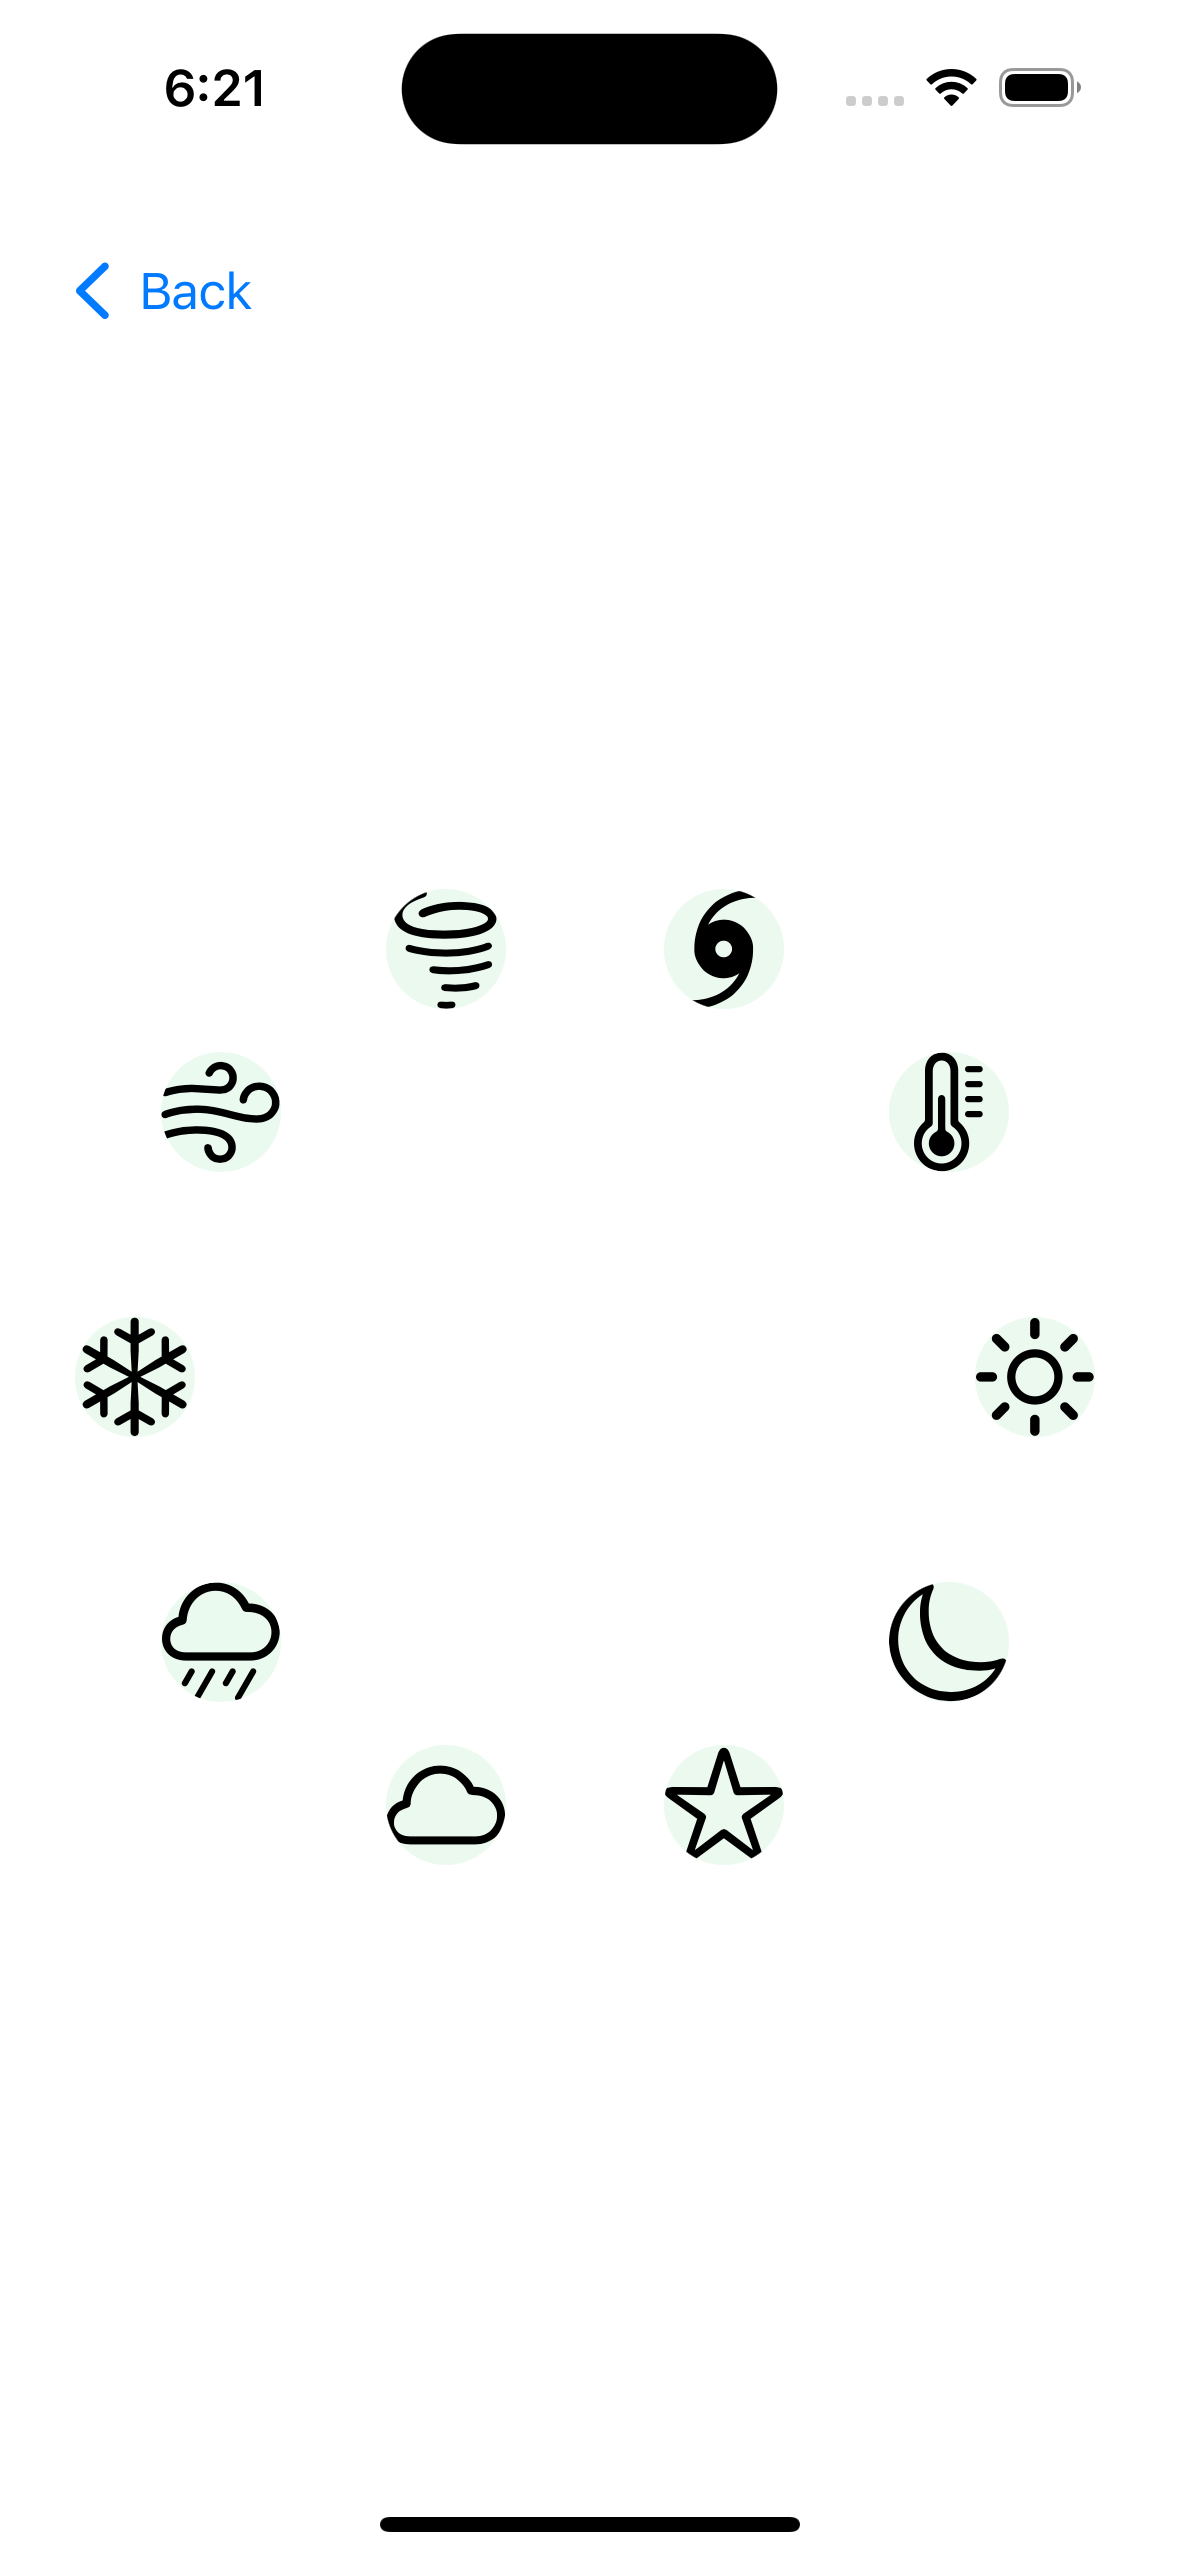
Circular Layout: Arranging Views in a Circle
The CircularLayout arranges its subviews in a circular pattern, ideal for creating menus or displays that need to radiate outward.
Defining the Layout Structure
Here’s the basic structure for our CircularLayout:
import SwiftUI

struct CircularLayout: Layout {
  struct CacheData {
    var positions: [CGPoint] = []
    var itemSize: CGSize = .zero
  }

  typealias Cache = CacheData

  func makeCache(subviews: Subviews) -> Cache {
    return CacheData()
  }

  func sizeThatFits(proposal: ProposedViewSize, subviews: Subviews, cache: inout Cache) -> CGSize {

  }

  func placeSubviews(in bounds: CGRect, proposal: ProposedViewSize, subviews: Subviews, cache: inout Cache) {

  }
}
How CircularLayout Works
- makeCache initializes a CacheData structure to store the calculated positions of each subview and the size of each item.
- sizeThatFits calculates the size of the circle based on the proposed width and height. It positions each item around a center point using trigonometric functions to determine their x and y coordinates. The angleIncrement divides the full circle into evenly spaced sections for each subview.
- placeSubviews positions each item at its calculated position within the bounds of the layout. It uses the cached positions to ensure that each item is placed accurately.
Calculating Sizes with sizeThatFits
In sizeThatFits, we’ll determine the layout’s size and calculate positions for each subview.
func sizeThatFits(proposal: ProposedViewSize, subviews: Subviews, cache: inout Cache) -> CGSize {
    let diameter = min(proposal.width ?? 200, proposal.height ?? 200)
    let radius = diameter / 2
    let center = CGPoint(x: radius, y: radius)
    let angleIncrement = (2 * CGFloat.pi) / CGFloat(subviews.count)

    cache.positions = []
    cache.itemSize = CGSize(width: diameter / 4, height: diameter / 4) // Arbitrary item size

    for index in subviews.indices {
      let angle = angleIncrement * CGFloat(index)
      let x = center.x + radius * cos(angle) - cache.itemSize.width / 2
      let y = center.y + radius * sin(angle) - cache.itemSize.height / 2
      cache.positions.append(CGPoint(x: x, y: y))
    }

    return CGSize(width: diameter, height: diameter)
  }
Explanation:
- Diameter and Radius: Determines the size of the circular layout.
- Position Calculation: Calculates positions around the circle’s circumference.
- Caching Positions: Stores positions and item size in the cache.
Placing Subviews with placeSubviews
In placeSubviews, we’ll position each subview at the calculated positions.
func placeSubviews(in bounds: CGRect, proposal: ProposedViewSize, subviews: Subviews, cache: inout Cache) {
    for index in subviews.indices {
      let position = cache.positions[index]
      subviews[index].place(
        at: CGPoint(x: bounds.minX + position.x, y: bounds.minY + position.y),
        proposal: ProposedViewSize(cache.itemSize)
      )
    }
  }
Explanation:
- Using Cached Positions: Positions subviews based on cached positions.
- Subview Placement: Places each subview within the layout bounds.
Incorporating Caching
Caching positions and item size minimizes calculations during the layout pass, enhancing performance.
Utilizing Size Proposals
By proposing a specific itemSize for each subview, we ensure consistent sizing across all subviews in the circular layout.
Using the CircularLayout
Here’s how you can use the CircularLayout in your SwiftUI views:
import SwiftUI

struct CircularLayoutView: View {
  let symbols = ["sun.max", "moon", "star", "cloud", "cloud.rain", "snow", "wind", "tornado", "hurricane", "thermometer"]

  var body: some View {
    CircularLayout() {
      ForEach(symbols, id: \.self) { symbol in
        Image(systemName: symbol)
          .resizable()
          .scaledToFit()
          .frame(width: 40, height: 40)
      }
    }
    .padding()
  }
  .frame(width: 300, height: 300)
}

#Preview {
  CircularLayoutView()
}
Flow Layout: Creating a Responsive Flow
The FlowLayout arranges subviews horizontally, wrapping them to a new line when the available space is exceeded. This layout is perfect for building tag clouds, galleries, or any interface that requires a flexible, flow-based arrangement.
Defining the Layout Structure
First, let’s define the basic structure of our FlowLayout:
import SwiftUI

struct FlowLayout: Layout {

  var spacing: CGFloat = 8

  struct CacheData {
    var sizes: [CGSize] = []
    var positions: [CGPoint] = []
  }

  typealias Cache = CacheData

  func makeCache(subviews: Subviews) -> CacheData {
    CacheData()
  }

  func sizeThatFits(proposal: ProposedViewSize, subviews: Subviews, cache: inout Cache) -> CGSize {

  }

  func placeSubviews(in bounds: CGRect, proposal: ProposedViewSize, subviews: Subviews, cache: inout Cache) {

  }
}
How FlowLayout Works
- makeCache initializes an empty cache to store the sizes and positions of each subview.
- sizeThatFits iterates through each subview, calculating its size and position. If adding a subview would exceed the available width, it wraps to the next line.
- placeSubviews uses the cached positions and sizes to position each subview correctly within the container.
Calculating Sizes with sizeThatFits
In sizeThatFits, we’ll calculate the size needed to fit all subviews, wrapping them as necessary.
func sizeThatFits(proposal: ProposedViewSize, subviews: Subviews, cache: inout Cache) -> CGSize {
  var currentX: CGFloat = 0
  var currentY: CGFloat = 0
  var lineHeight: CGFloat = 0
  let maxWidth = proposal.width ?? .infinity

  cache.sizes = []
  cache.positions = []

  for subview in subviews {
    let subviewSize = subview.sizeThatFits(.unspecified)
    if currentX + subviewSize.width > maxWidth {
      currentX = 0
      currentY += lineHeight + spacing
      lineHeight = 0
    }

    cache.positions.append(CGPoint(x: currentX, y: currentY))
    cache.sizes.append(subviewSize)

    currentX += subviewSize.width + spacing
    lineHeight = max(lineHeight, subviewSize.height)
  }

  return CGSize(width: maxWidth, height: currentY + lineHeight)
}
Explanation:
- Position Calculation: Determines positions for each subview, wrapping to the next line when necessary.
- Caching Sizes and Positions: Stores subview sizes and positions in cache for reuse in placeSubviews.
Placing Subviews with placeSubviews
In placeSubviews, we’ll position each subview according to the calculated positions.
func placeSubviews(in bounds: CGRect, proposal: ProposedViewSize, subviews: Subviews, cache: inout Cache) {
    for index in subviews.indices {
      let position = cache.positions[index]
      let size = cache.sizes[index]
      subviews[index].place(
        at: CGPoint(x: bounds.minX + position.x, y: bounds.minY + position.y),
        proposal: ProposedViewSize(width: size.width, height: size.height)
      )
    }
  }
Explanation:
- Using Cached Data: Retrieves positions and sizes from the cache to place subviews efficiently.
- Subview Placement: Positions each subview within the layout bounds.
Incorporating Caching
By storing subview sizes and positions in the cache, we avoid redundant calculations during the layout process. This optimization is especially beneficial when dealing with a large number of subviews.
Utilizing Size Proposals
We use .unspecified in sizeThatFits to allow subviews to choose their preferred sizes. This ensures that each subview can size itself appropriately before we arrange them.
Using the FlowLayout
Here’s how you can use the FlowLayout in your SwiftUI views:
import SwiftUI

struct FlowLayoutView: View {
  let symbols = ["sun.max", "moon", "star", "cloud", "cloud.rain", "snow", "wind", "tornado", "hurricane", "thermometer"]

  var body: some View {
    FlowLayout(spacing: 12) {
      ForEach(symbols, id: \.self) { symbol in
        Image(systemName: symbol)
          .resizable()
          .scaledToFit()
          .frame(width: 50, height: 50)
          .background(Color.blue.opacity(0.1))
          .cornerRadius(8)
      }
    }
    .padding()
  }
}

#Preview {
  FlowLayoutView()
}
Conclusion
The Layout protocol in SwiftUI empowers developers to create custom and flexible layouts. By understanding and implementing sizeThatFits and placeSubviews, and incorporating advanced concepts like Caching and Size Proposals, you can build highly optimized and dynamic user interfaces.
Key Takeaways:
- Custom Layouts: Offer fine-grained control over view arrangement.
- Caching: Improves performance by storing intermediate calculations.
- Size Proposals: Allow subviews to influence their own size, leading to more adaptable layouts.
Experiment with the Layout protocol to create unique and responsive designs. Whether you’re arranging views in a flow or distributing them around a circle, SwiftUI’s layout system provides the tools you need to bring your UI concepts to life.
If you want to learn more about native mobile development, you can check out the other articles I have written here: https://medium.com/@wesleymatlock
🚀 Happy coding! 🚀
By Wesley Matlock on October 7, 2024.
Exported from Medium on May 10, 2025.