As someone who’s had the chance to work on streaming apps used by millions, I can tell you — capturing user attention right from the Apple…
Boosting Engagement with Top Shelf: A tvOS Extension Tutorial

As someone who’s had the chance to work on streaming apps used by millions, I can tell you — capturing user attention right from the Apple TV home screen is gold. When your app is featured in the Top Shelf, it’s like throwing up a billboard that says, “Hey, come check out this awesome content!” and it does this without the user even having to open your app. So, if you’ve got a tvOS app and want to highlight key content, you’re in the right place.
In this post, I’ll walk you through adding a Top Shelf extension to your tvOS app, explain why it’s so important, and how you can make it shine. I’ll sprinkle in some tips from my own experience working on streaming apps — apps that serve millions — so you can add some extra “wow” factor to your Top Shelf content.
What’s the Big Deal with Top Shelf?
The Top Shelf is a section on the Apple TV home screen that lets apps in the top row display content. For streaming apps, this feature is prime real estate. You can showcase:
- Recently watched shows: Keep users coming back to their favorite content.
- New releases: Spotlight the freshest, most binge-worthy shows or movies.
- Personalized recommendations: Present content that says, “Hey, you might like this based on what you watched last night!”
In streaming apps, it’s all about making the app sticky — getting users to dive back in, watch another episode, or explore new content. And trust me, I’ve seen firsthand how well-crafted Top Shelf content can have a direct impact on user engagement.
Step 1: Adding the Top Shelf Extension
Let’s start by adding the Top Shelf extension to your app.
- In Xcode, go to File > New > Target.
- Select tvOS Top Shelf Extension from the list.
- Name it something cool, like TopShelfExtension. Boom — you’re halfway there!
This new target acts as a separate process from your main app and handles the content that will be displayed on the home screen. Think of it as your personal billboard manager, always there to draw users back into your app.
Step 2: Implementing Multiple Top Shelf Items
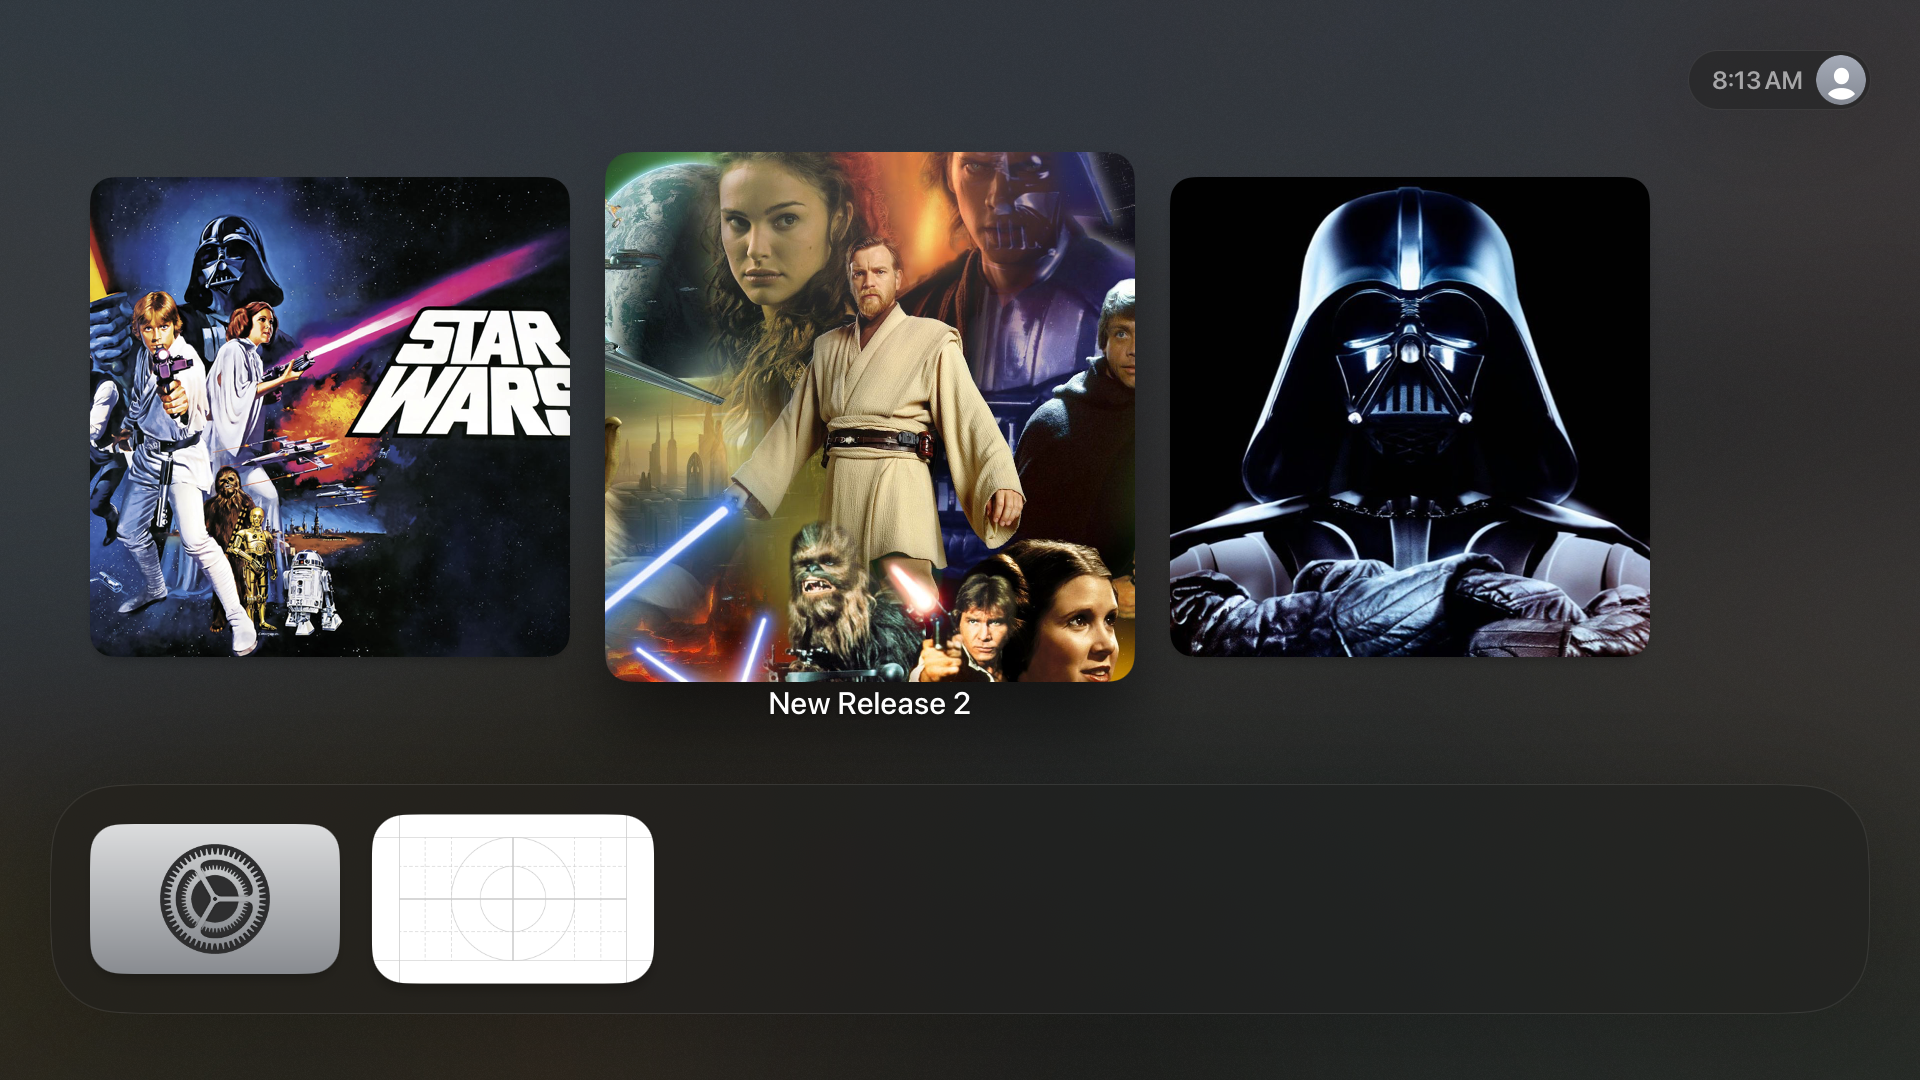
If you want to show multiple pieces of content at once (e.g., several new releases or trending movies), you can do so by using TVTopShelfSectionedItem. This section will walk you through setting up a Top Shelf with three featured items, each with their own image, title, and deep-link action.
import TVServices

class TopShelfContentProvider: TVTopShelfContentProvider {

    override func loadTopShelfContent(completionHandler: @escaping (TVTopShelfContent?) -> Void) {
        // Create Top Shelf sectioned items
        let item1 = TVTopShelfSectionedItem(identifier: "item-1")
        let item2 = TVTopShelfSectionedItem(identifier: "item-2")
        let item3 = TVTopShelfSectionedItem(identifier: "item-3")

        // Load and set images for the items
        if let imageURL1 = Bundle.main.url(forResource: "starwars", withExtension: "jpg"),
           let imageURL2 = Bundle.main.url(forResource: "starwars-large", withExtension: "jpg"),
           let imageURL3 = Bundle.main.url(forResource: "darthmax", withExtension: "jpg") {
            item1.setImageURL(imageURL1, for: .screenScale2x)
            item2.setImageURL(imageURL2, for: .screenScale2x)
            item3.setImageURL(imageURL3, for: .screenScale2x)
        } else {
            print("Error loading images for Top Shelf.")
        }

        // Set titles and actions for the items
        item1.title = "New Release 1"
        item2.title = "New Release 2"
        item3.title = "New Release 3"

        item1.displayAction = TVTopShelfAction(url: URL(string: "myapp://newrelease1")!)
        item2.displayAction = TVTopShelfAction(url: URL(string: "myapp://newrelease2")!)
        item3.displayAction = TVTopShelfAction(url: URL(string: "myapp://newrelease3")!)

        // Create a section and add the items
        let section = TVTopShelfItemCollection(items: [item1, item2, item3])

        // Create the sectioned content
        let sectionedContent = TVTopShelfSectionedContent(sections: [section])

        // Call the completion handler with the sectioned content
        completionHandler(sectionedContent)
    }
}
- Multiple Items: We’re creating three distinct TVTopShelfSectionedItem instances, each representing different content (e.g., “New Release 1,” “New Release 2,” etc.).
- Loading Images: The images are loaded from the app’s bundle and assigned to each item using setImageURL. This approach ensures each item has a unique image.
- Deep Linking: Each item has a TVTopShelfAction, which uses a custom URL scheme to deep-link into specific content within your app (myapp://newrelease1, myapp://newrelease2, etc.).
- Sectioned Content: All the items are grouped into a TVTopShelfItemCollection, which is then passed into TVTopShelfSectionedContent. This is returned to the completion handler to be displayed in the Top Shelf.
Step 3: Full-Screen, Featured Content
Sometimes you might want to showcase just one full-screen, high-impact image. This is useful for highlighting key content like a featured movie or a major event. Here’s how you can do that:
import TVServices

class TopShelfContentProvider: TVTopShelfContentProvider {

  override func loadTopShelfContent(completionHandler: @escaping (TVTopShelfContent?) -> Void) {
    // Create the sectioned item for Top Shelf
    let sectionedItem = TVTopShelfSectionedItem(identifier: "featured-content")

    // Load the image from the bundle
    if let imageURL = Bundle.main.url(forResource: "starwars-large", withExtension: "jpg") {
      sectionedItem.setImageURL(imageURL, for: .screenScale2x) // Set the large image
    } else {
      print("Error loading image for Top Shelf.")
    }

    // Set the title and action for the item
    sectionedItem.title = "Featured Movie"
    sectionedItem.displayAction = TVTopShelfAction(url: URL(string: "myapp://featured")!)

    // Create a section and add the sectioned item
    let section = TVTopShelfItemCollection(items: [sectionedItem])

    // Create the sectioned content
    let sectionedContent = TVTopShelfSectionedContent(sections: [section])

    // Call the completion handler with the sectioned content
    completionHandler(sectionedContent)
  }
}
- Single, Full-Screen Image: This approach is perfect for creating a high-impact, full-width image that takes up the entire Top Shelf. The starwars-large.jpg image will span the entire width of the Top Shelf display.
- Deep Linking: As before, this featured item can link directly to content inside your app, making it interactive.
Step 4: Configuring the Info.plist
To ensure that the Top Shelf extension runs properly, you’ll need to set the NSExtensionPrincipalClass in your extension’s Info.plist. This tells the system which class provides the content for the Top Shelf.
<key>NSExtensionPrincipalClass</key>
<string>$(PRODUCT_MODULE_NAME).TopShelfContentProvider</string>
Best Practices for Top Shelf Content
- High-Resolution Images: Ensure your images are 1920x720 for 1080p Apple TVs and 3840x1440 for 4K devices.
- 16:9 Aspect Ratio: Keep the aspect ratio of your images at 16:9 to avoid cropping or distortion.
- Dynamic Content: Use deep linking to make your Top Shelf content actionable. This allows users to quickly jump into specific content in your app.
Conclusion
By adding a Top Shelf extension to your tvOS app, you can transform the Apple TV home screen into a powerful tool for increasing user engagement. Whether you’re displaying multiple items or highlighting a full-screen, featured image, the Top Shelf makes it easy to capture attention and drive interaction.
If you want to learn more about native mobile development, you can check out the other articles I have written here: https://medium.com/@wesleymatlock
🚀 Happy coding! 🚀
By Wesley Matlock on October 24, 2024.
Exported from Medium on May 10, 2025.