SwiftUI’s List is a powerful and flexible container view that can display a scrollable list of data. While creating a basic list is…
Advanced Techniques for Using List in SwiftUI
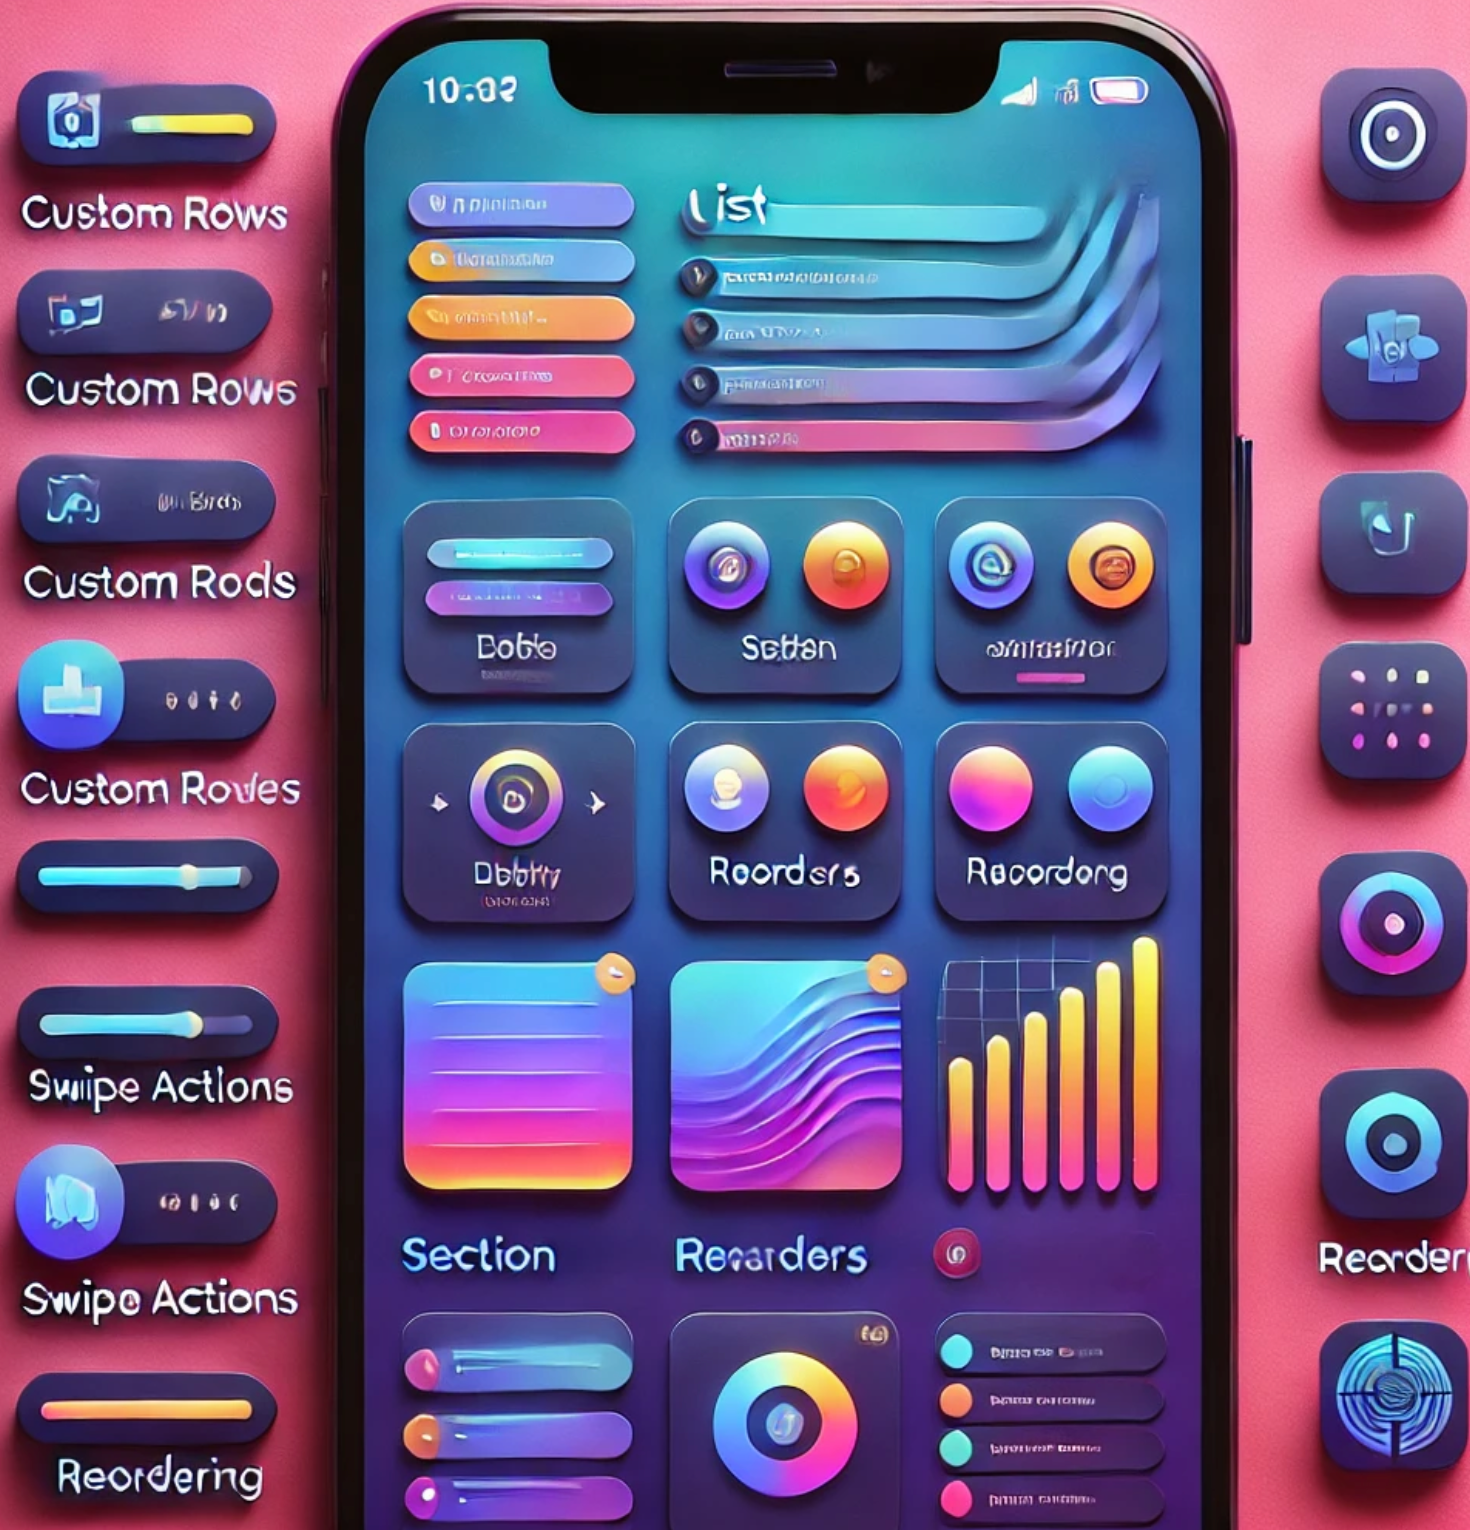
SwiftUI’s List is a powerful and flexible container view that can display a scrollable list of data. While creating a basic list is straightforward, there are many advanced techniques and tips that can help you take full advantage of this powerful component. In this blog post, we’ll explore some advanced uses of List in SwiftUI, including customizations, optimizations, and sample applications, complete with unit tests.
Table of Contents
- Introduction to
List - Customizing List Rows
- Section Headers and Footers
- Swipe Actions
- Reordering List Items
- Filtering and Searching
- Using SwiftData with List
- Unit Testing Lists
- Sample Application
1. Introduction to List
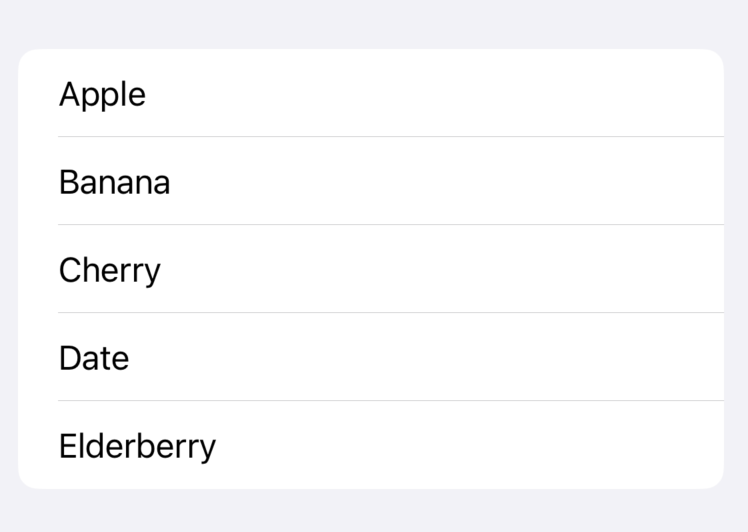
The List view in SwiftUI is used to present data in a scrollable and vertically arranged manner. It can be created with static data or dynamically with data collections.
struct SimpleListView: View {
    let items = ["Apple", "Banana", "Cherry", "Date", "Elderberry"]

    var body: some View {
        List(items, id: \.self) { item in
            Text(item)
        }
    }
}
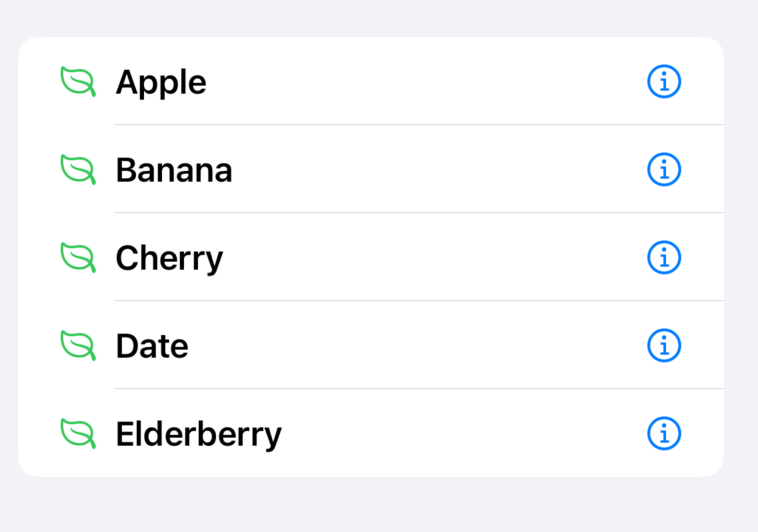
2. Customizing List Rows
Customizing the rows in a List can help make your app’s UI more engaging and informative. You can include images, buttons, or other SwiftUI views within each row.
struct CustomRowListView: View {
    let items = ["Apple", "Banana", "Cherry", "Date", "Elderberry"]

    var body: some View {
        List(items, id: \.self) { item in
            HStack {
                Image(systemName: "leaf")
                    .foregroundColor(.green)
                Text(item)
                    .font(.headline)
                Spacer()
                Button(action: {
                    print("\(item) selected")
                }) {
                    Image(systemName: "info.circle")
                }
            }
        }
    }
}
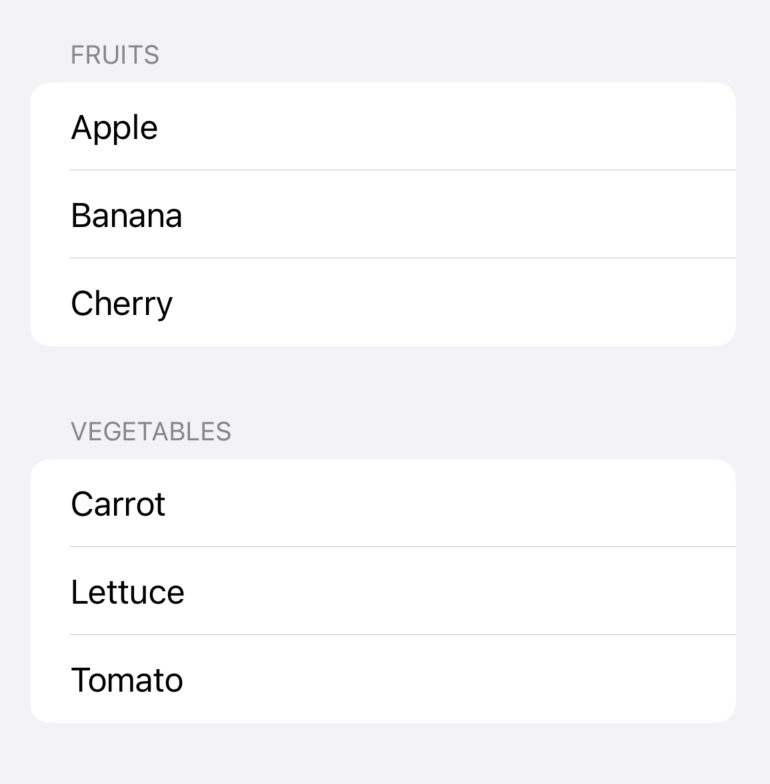
3. Section Headers and Footers
Using section headers and footers can help group related items together and provide additional context to the user.
struct SectionedListView: View {
    let fruits = ["Apple", "Banana", "Cherry"]
    let vegetables = ["Carrot", "Lettuce", "Tomato"]

    var body: some View {
        List {
            Section(header: Text("Fruits")) {
                ForEach(fruits, id: \.self) { item in
                    Text(item)
                }
            }
            Section(header: Text("Vegetables")) {
                ForEach(vegetables, id: \.self) { item in
                    Text(item)
                }
            }
        }
    }
}
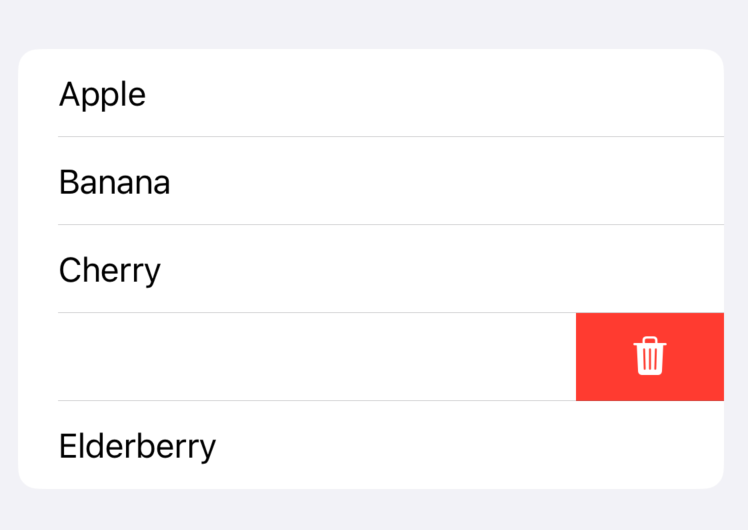
4. Swipe Actions
Swipe actions can be added to list items to provide quick access to common actions, like delete or edit.
struct SwipeActionListView: View {
    @State private var items = ["Apple", "Banana", "Cherry", "Date", "Elderberry"]

    var body: some View {
        List {
            ForEach(items, id: \.self) { item in
                Text(item)
                    .swipeActions {
                        Button(role: .destructive) {
                            if let index = items.firstIndex(of: item) {
                                items.remove(at: index)
                            }
                        } label: {
                            Label("Delete", systemImage: "trash")
                        }
                    }
            }
        }
    }
}
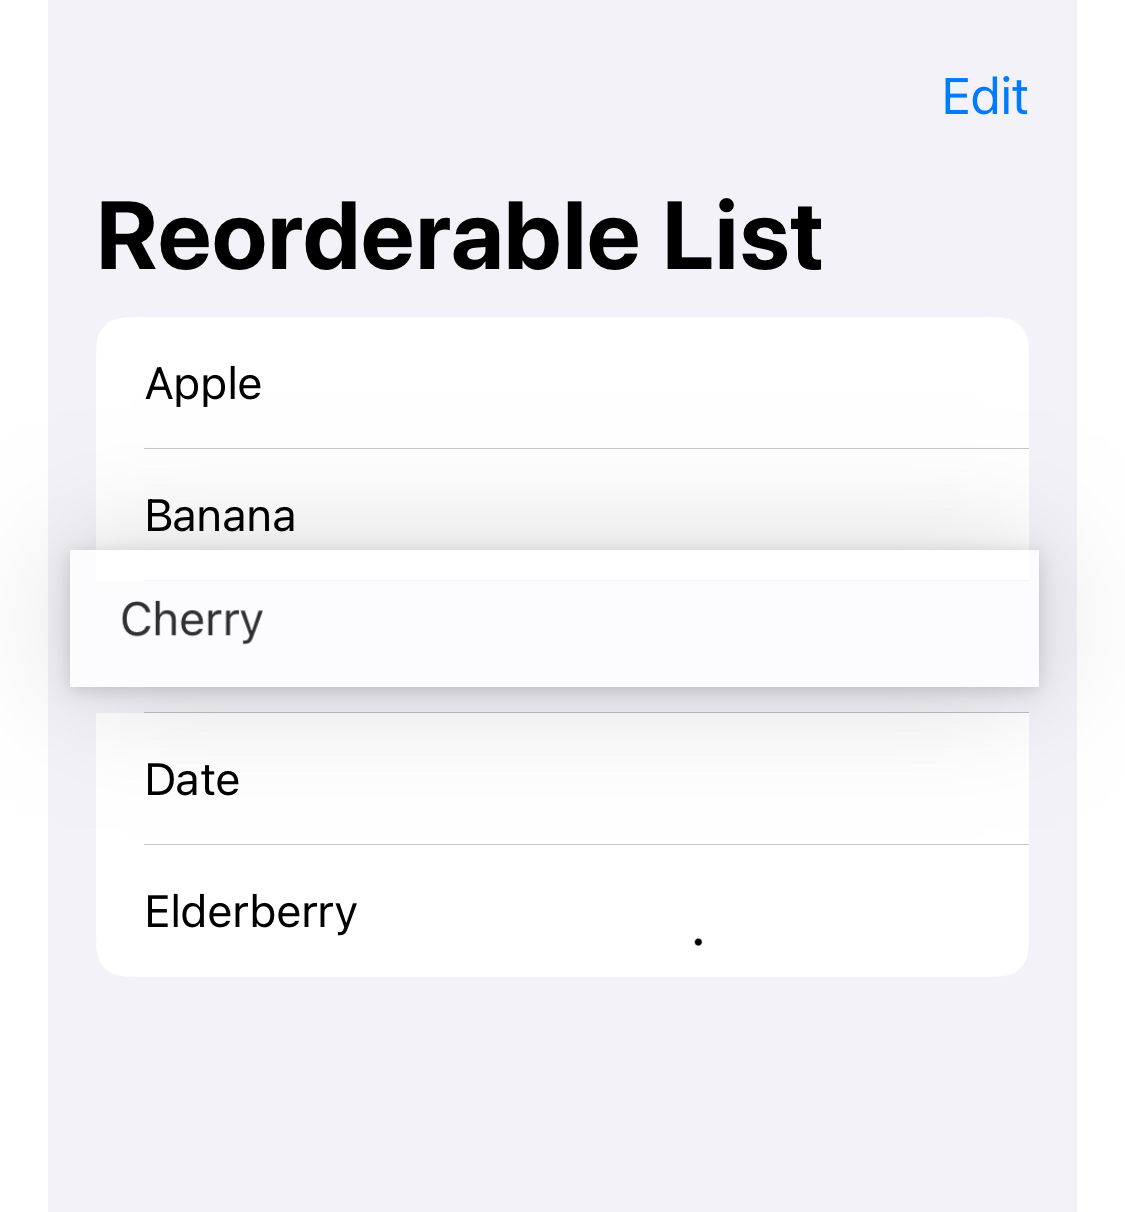
5. Reordering List Items
Reordering items in a list can enhance the user experience by allowing them to organize data as they see fit.
struct ReorderableListView: View {
  @State private var items = ["Apple", "Banana", "Cherry", "Date", "Elderberry"]
  @Environment(\.editMode) private var editMode

  var body: some View {
    NavigationView {
      List {
        ForEach(items, id: \.self) { item in
          HStack {
            Image(systemName: "line.horizontal.3")
              .foregroundColor(.gray)
            Text(item)
              .font(.headline)
          }
          .padding(.vertical, 8)
        }
        .onMove(perform: move)
      }
      .animation(.default, value: items)
      .navigationTitle("Reorder List")
      .toolbar {
        EditButton() // Enables reordering
      }
    }
  }
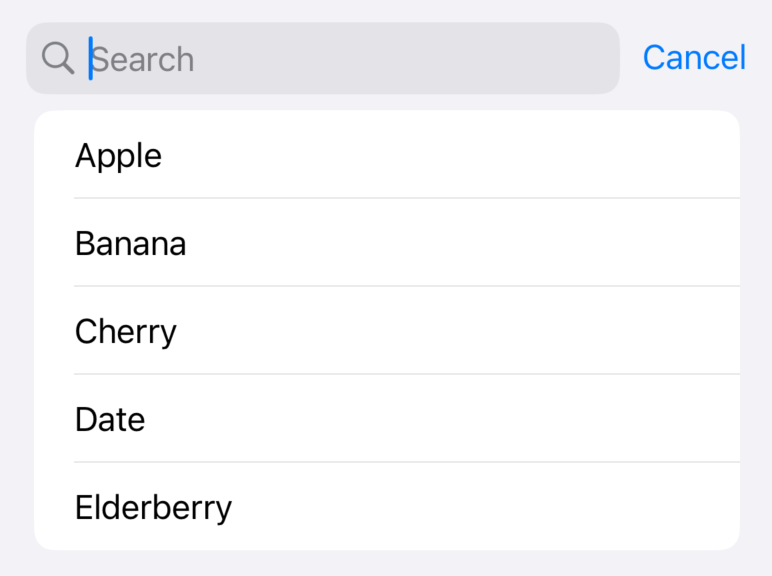
6. Filtering and Searching
Implementing search functionality allows users to quickly find items in the list.
struct SearchableListView: View {
    @State private var searchText = ""
    let items = ["Apple", "Banana", "Cherry", "Date", "Elderberry"]

    var filteredItems: [String] {
        if searchText.isEmpty {
            return items
        } else {
            return items.filter { $0.contains(searchText) }
        }
    }

    var body: some View {
        List(filteredItems, id: \.self) { item in
            Text(item)
        }
        .searchable(text: $searchText)
    }
}
7. Unit Testing Lists
Unit tests ensure that your List implementation behaves as expected. Using the XCTest framework, you can write tests for your list view models and interactions.
import XCTest
import SwiftUI
import ViewInspector
@testable import YourApp

final class ListViewTests: XCTestCase {

    func testListItems() throws {
        let view = SimpleListView()
        let list = try view.inspect().list()
        XCTAssertEqual(list.count, 5)
        XCTAssertEqual(try list.text(0).string(), "Apple")
    }

    func testSwipeAction() throws {
        var view = SwipeActionListView()
        let indexPath = IndexSet(integer: 0)
        view.move(from: indexPath, to: 1)
        XCTAssertEqual(view.items[1], "Apple")
    }
}
9. Sample Application
Here is a complete sample application that demonstrates the techniques discussed above.
import SwiftUI

@main
struct ListDemoApp: App {
    var body: some Scene {
        WindowGroup {
            TabView {
                SimpleListView()
                    .tabItem {
                        Label("Simple List", systemImage: "list.bullet")
                    }
                CustomRowListView()
                    .tabItem {
                        Label("Custom Rows", systemImage: "rectangle.3.offgrid")
                    }
                SectionedListView()
                    .tabItem {
                        Label("Sections", systemImage: "square.stack.3d.up")
                    }
                SwipeActionListView()
                    .tabItem {
                        Label("Swipe Actions", systemImage: "hand.point.right")
                    }
                ReorderableListView()
                    .tabItem {
                        Label("Reorder", systemImage: "arrow.up.arrow.down")
                    }
                SearchableListView()
                    .tabItem {
                        Label("Search", systemImage: "magnifyingglass")
                    }
                SwiftDataListView()
                    .tabItem {
                        Label("Swift Data", systemImage: "database")
                    }
            }
        }
    }
}
This sample application showcases different List implementations, demonstrating how to customize, manage, and enhance lists in SwiftUI.
Conclusion
SwiftUI’s List view is a versatile tool for displaying data in your app. By using the advanced techniques and tips shared in this blog post, you can create more dynamic, interactive, and user-friendly lists. From customizing rows and adding swipe actions to integrating with SwiftData and adding unit tests, these examples will help you make the most of SwiftUI’s List.
If you want to learn more about native mobile development, you can check out the other articles I have written here: https://medium.com/@wesleymatlock
Happy coding! 🚀
By Wesley Matlock on July 2, 2024.
Exported from Medium on May 10, 2025.